
Benutzerhandbuch
Grok Imagine Outpainting: Wie schreibe ich den Prompt? 5 Beispiele und eine Formel
Quadrat auf 16:9 und 9:16 erweitern, 2:1-Banner, vertikales Interieur – plus ein fehlgeschlagenes Beispiel, damit du lernst, wie du das Motiv beim Erweitern erhältst.
Beim Outpainting mit Grok Imagine übergibst du das Originalbild an grok-imagine/image-to-image, setzt aspect_ratio auf das gewünschte breitere oder höhere Format und schreibst im Prompt drei Dinge klar: was unverändert bleiben muss, was den neuen Raum füllt und dass nichts Neues hinzugefügt werden soll. 1K kostet $0.033 pro Bild. Unten findest du 4 erfolgreiche Outpaintings und 1 fehlgeschlagenes, jedes wurde nur einmal generiert.
Vorab eine Klarstellung: Grok Imagine zeichnet das gesamte Bild im neuen Format neu, es ist kein präzises Outpainting, bei dem nur an den Rändern Pixel ergänzt werden. Position und Details des Motivs können sich ändern – prüfe das Ergebnis vor der Verwendung.
1. Quadratisches Produktfoto auf 16:9 erweitern
Originalbild, 1:1:
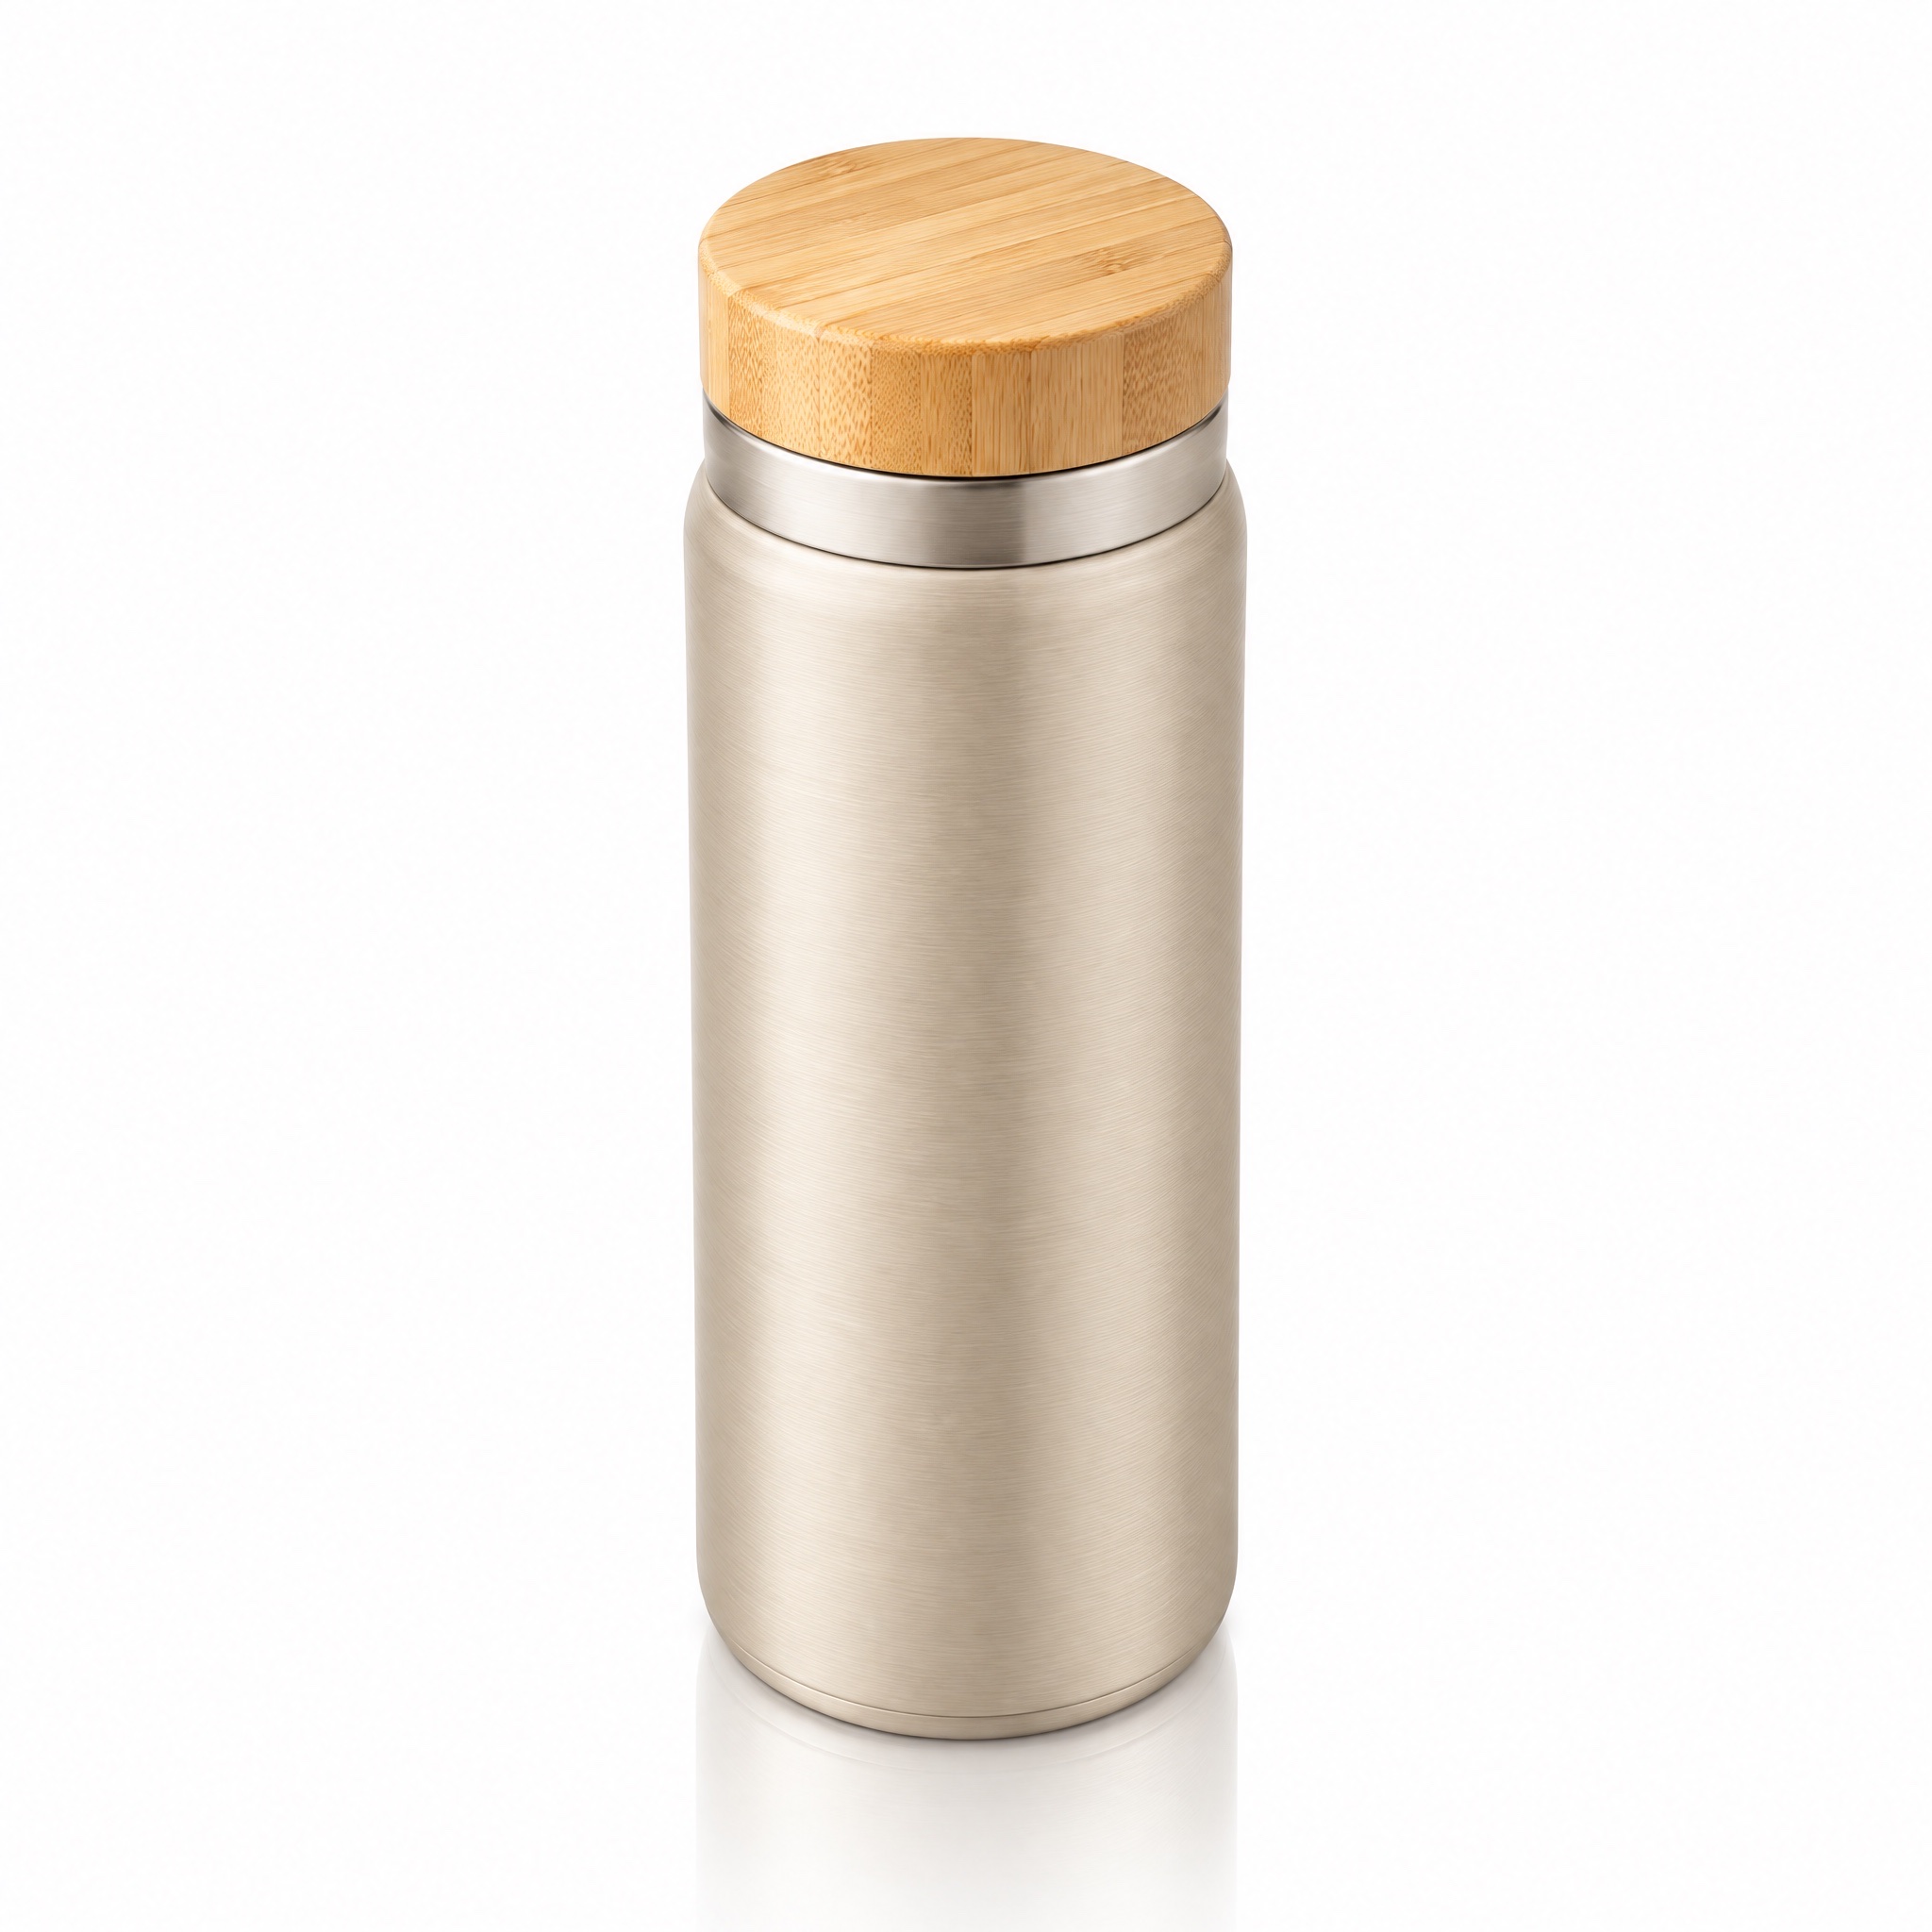
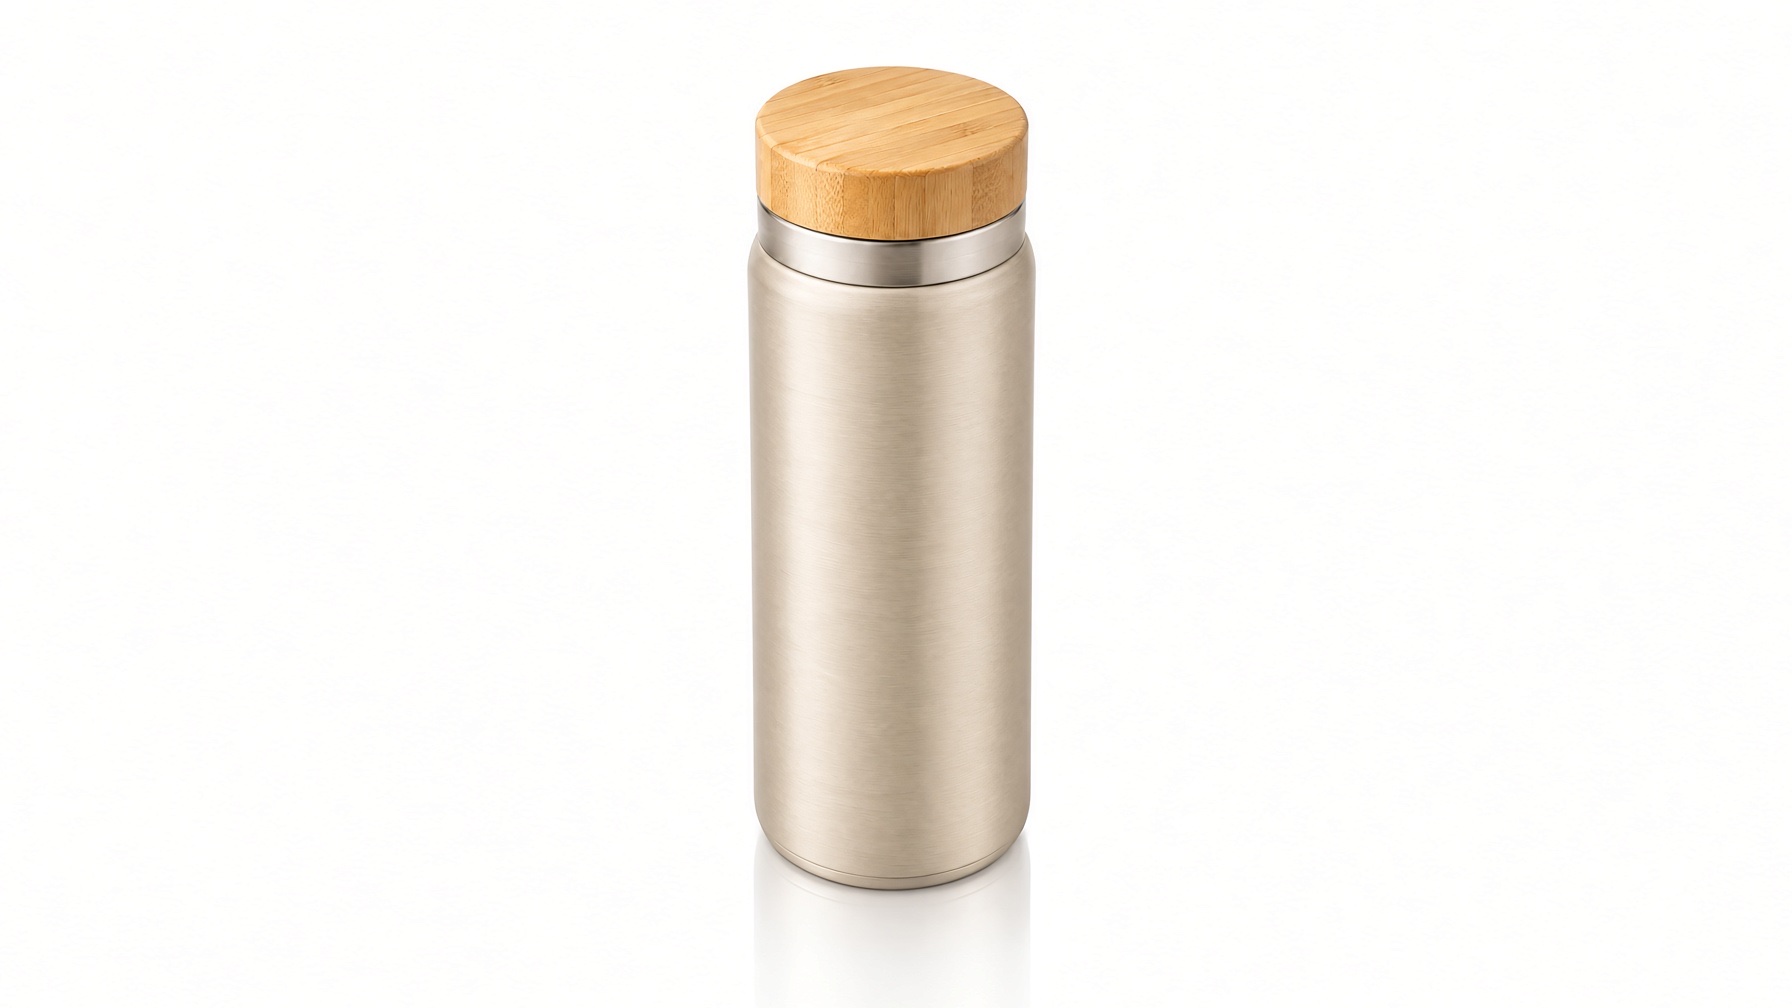
Extend this product photo to a wider 16:9 frame. Keep the thermos bottle exactly as it is, same size, shape, color and position in the center. Fill the new space on the left and right with the same seamless pure white studio background and the same soft top-left lighting. No new objects, no text.
Mit diesem Prompt generieren → (lade dein Bild hoch, Format 16:9, 1K)
grok-imagine/image-to-image, aspect_ratio: "16:9", 1K, Ausgabe 1792×1008, $0.033.
Form, Bambusdeckel und Haptik der Flasche bleiben erhalten, und der weiße Hintergrund dehnt sich sauber aus. Doch die Flasche blieb nicht in der Mitte, sondern wurde ins linke Drittel verschoben. Wenn die Position wichtig ist, prüfe das Ergebnis oder schneide es anschließend wieder mittig zu.
2. Dasselbe Bild, Prompt zu einfach formuliert
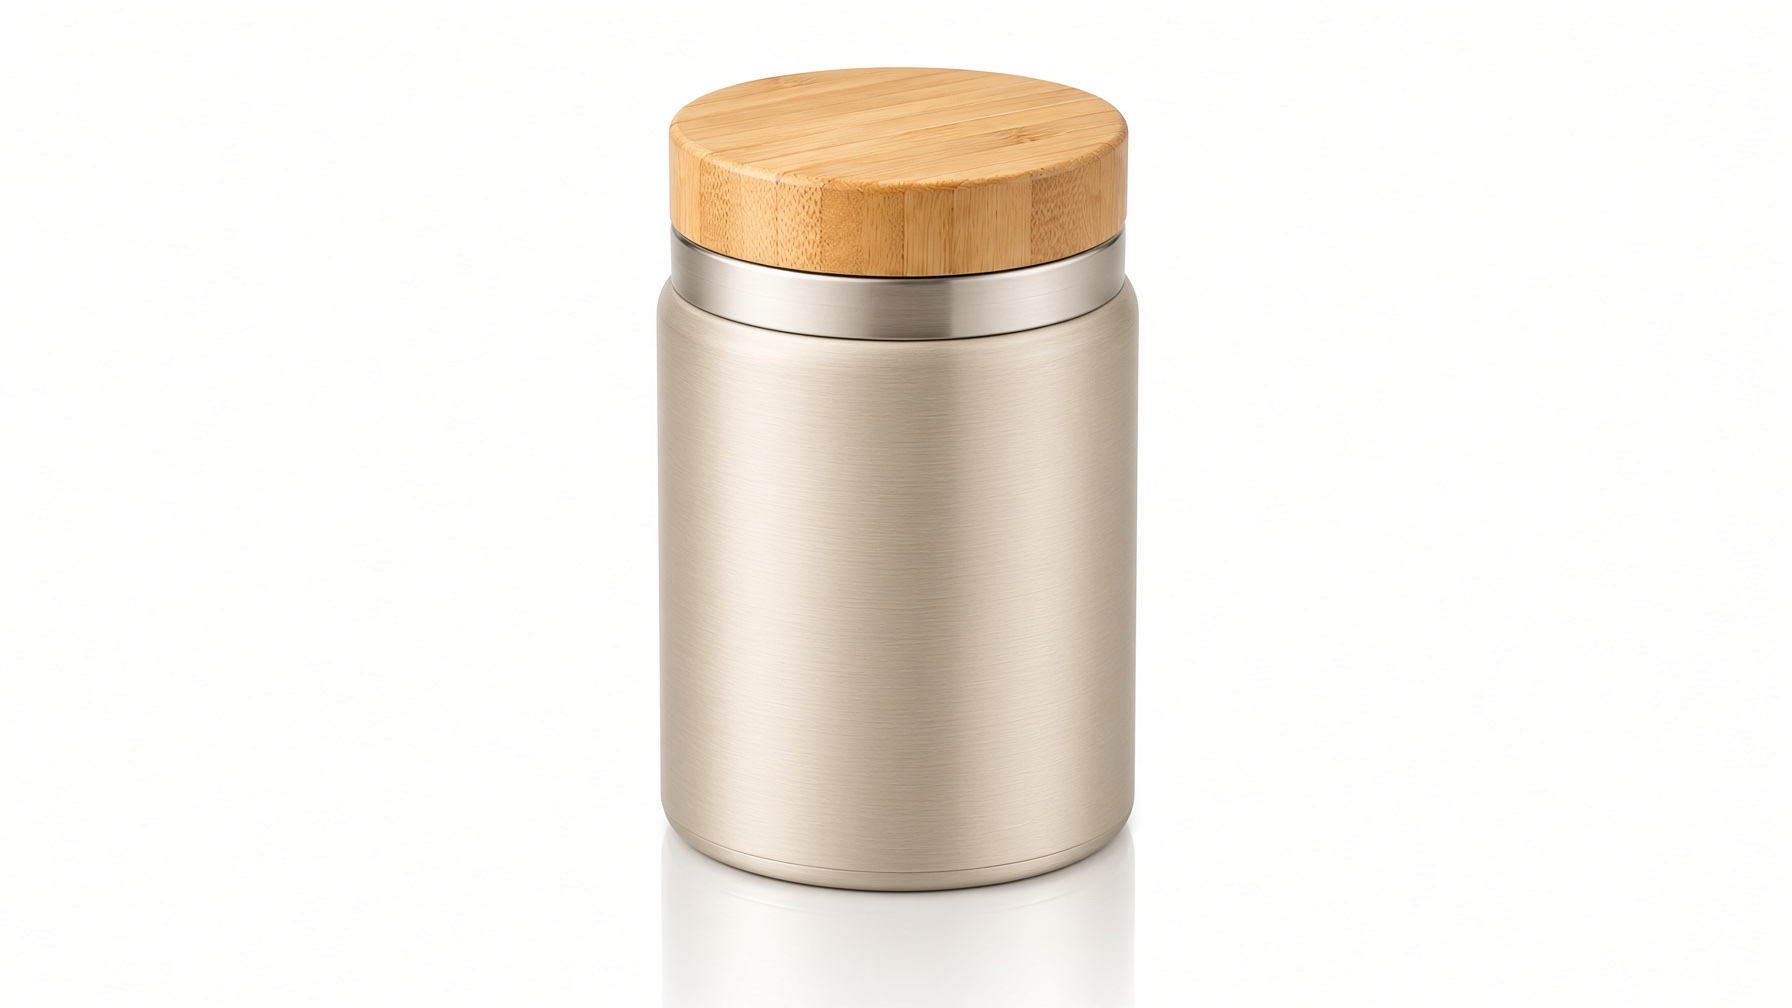
Make it wider.
grok-imagine/image-to-image, aspect_ratio: "16:9", 1K, $0.033.
„Make it wider“ wurde wörtlich verstanden: Das Bild ist jetzt 16:9, aber die Flasche selbst wurde breiter und niedriger gezeichnet. Das ist die häufigste Falle beim Outpainting. Schreibe „extend the frame / background“ (Bild bzw. Hintergrund erweitern) und gib an, dass das Motiv seine ursprüngliche Größe und Form behält.
3. Quadrat auf 9:16 vertikal erweitern, oben Platz für eine Überschrift lassen
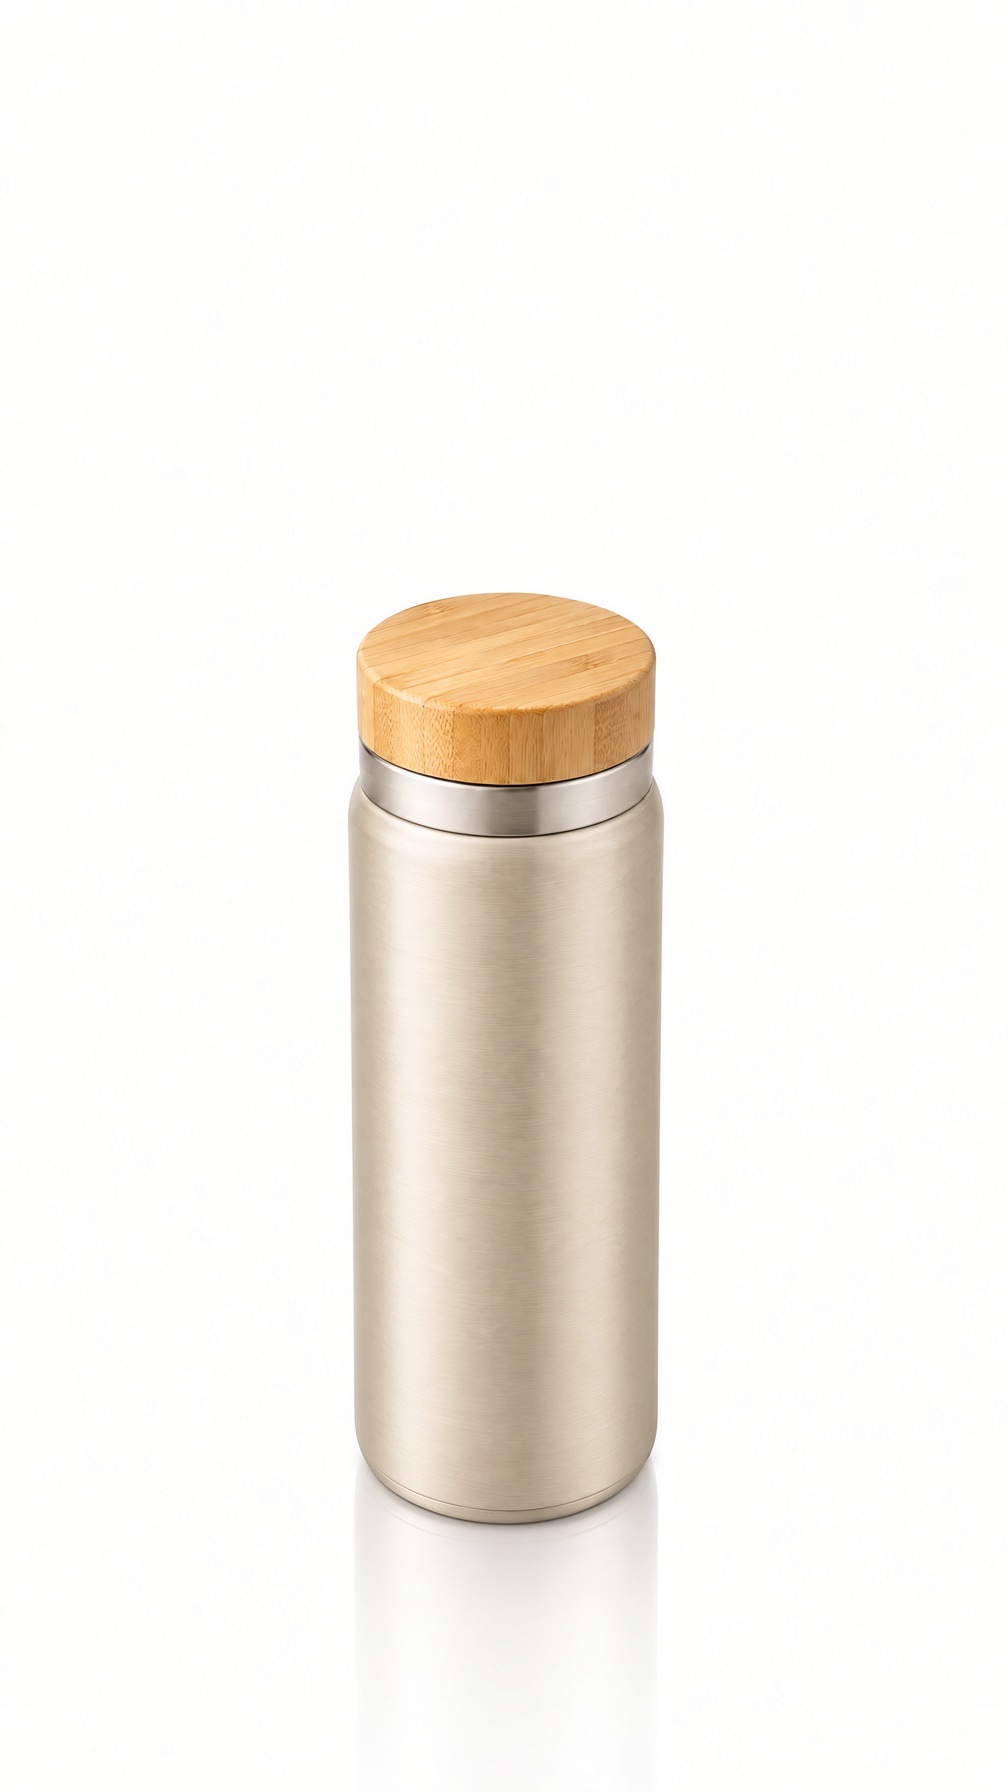
Extend this product photo to a tall 9:16 frame. Keep the thermos bottle exactly as it is in the middle. Continue the seamless pure white studio background above and below it with the same soft lighting, leaving empty space at the top for a headline. No new objects, no text.
Mit diesem Prompt generieren → (lade dein Bild hoch, Format 9:16, 1K)
grok-imagine/image-to-image, aspect_ratio: "9:16", 1K, Ausgabe 1008×1792, $0.033.
Mit dem Satz „oben Platz für eine Überschrift lassen“ erhältst du in einem Schritt ein direkt einsetzbares vertikales Cover: Das Produkt unten, oben bleibt Raum für Text.
4. Lifestyle-Bild von 4:3 auf 2:1-Banner erweitern
Originalbild, 4:3:
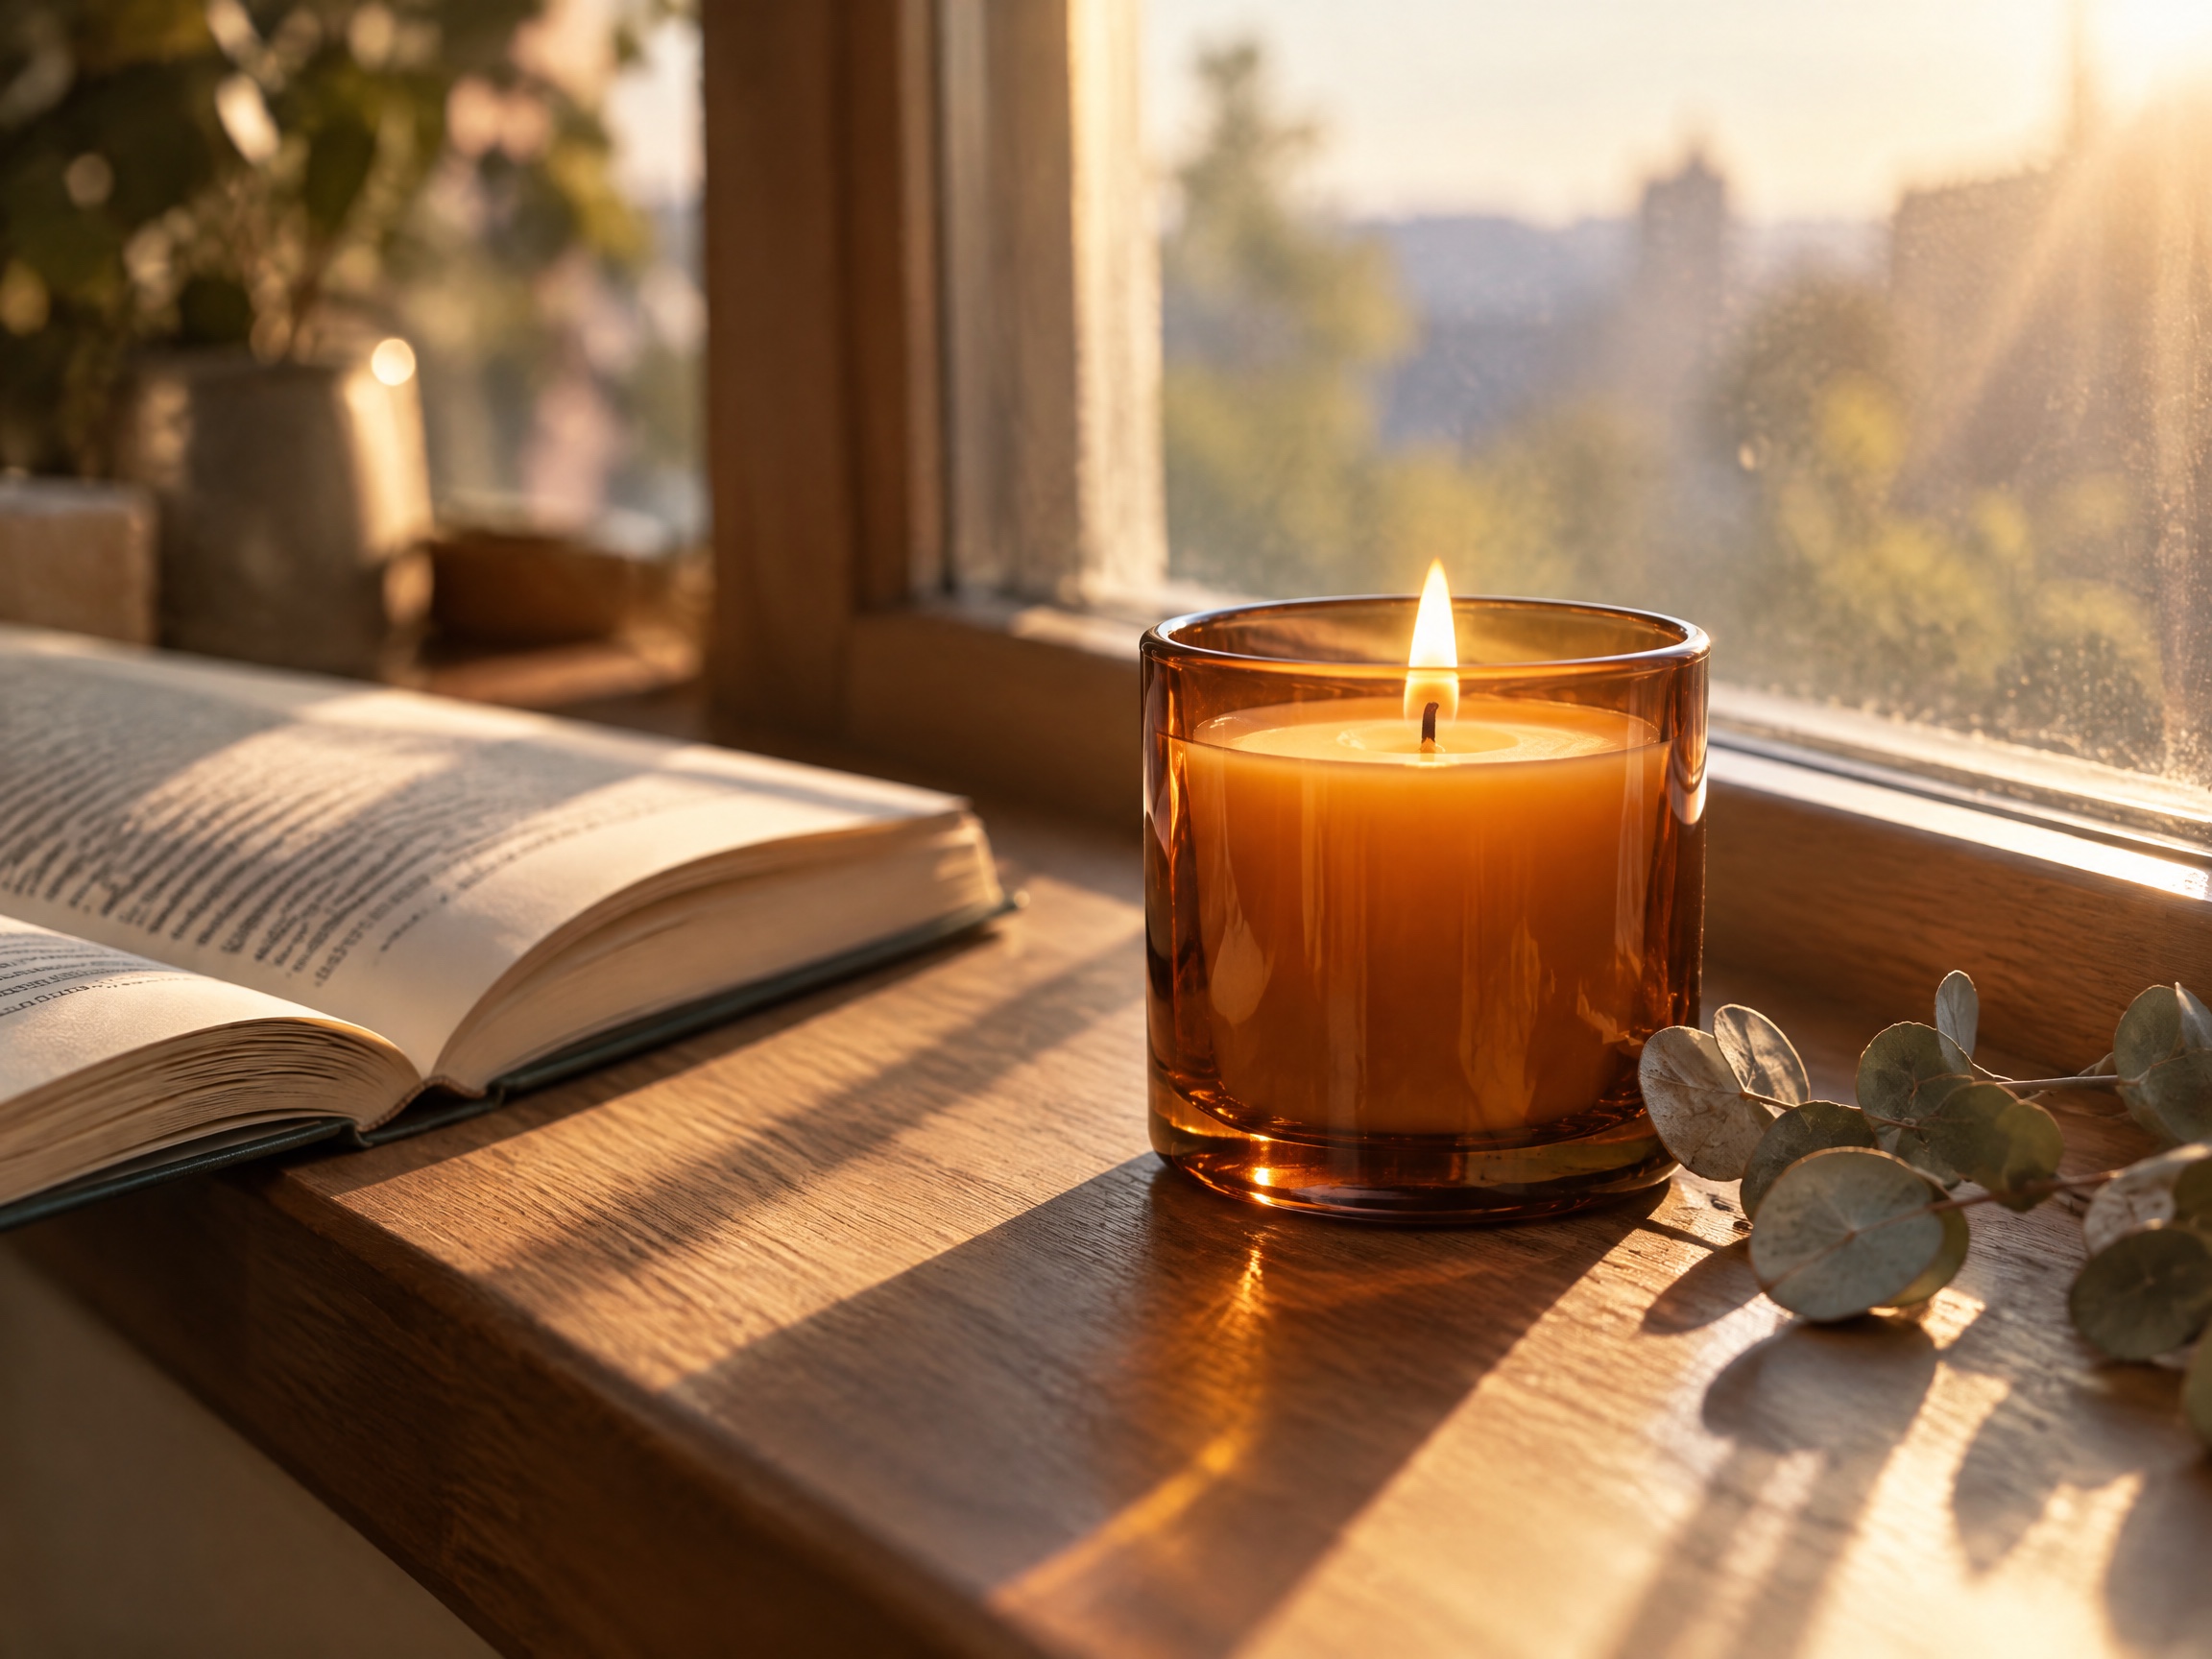
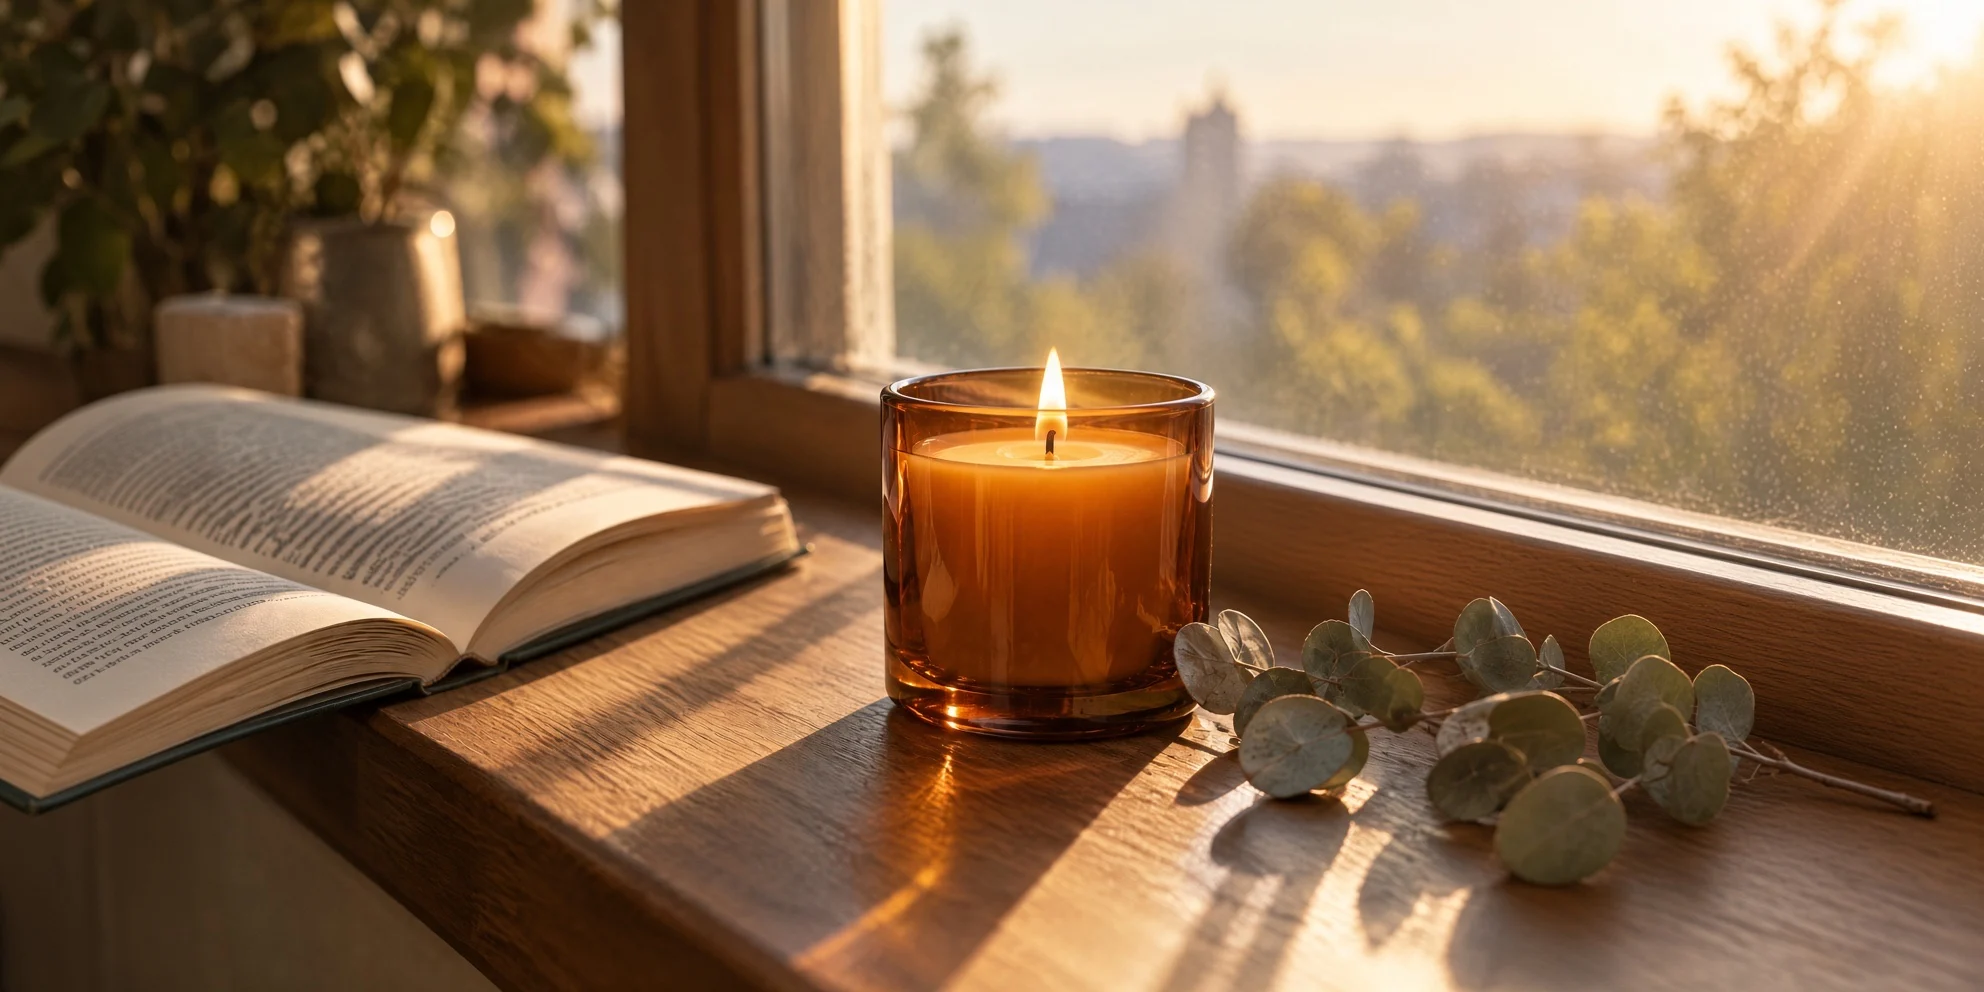
Outpaint this photo to a wide 2:1 panorama. Keep the candle, book and eucalyptus exactly as they are. Continue the wooden windowsill, the window frame and the morning light to the left and right, with the same warm color and shallow depth of field. Add nothing that draws attention away from the candle.
Mit diesem Prompt generieren → (lade dein Bild hoch, Format 2:1, 1K)
grok-imagine/image-to-image, aspect_ratio: "2:1", 1K, Ausgabe 1984×992, $0.033.
Nur wenn du benennst, was fortgesetzt werden soll (Fensterbank, Fensterrahmen, Licht), malt das Modell die Szene nach außen weiter, statt eine neue Szene zu beginnen. „Nichts hinzufügen, das von der Kerze ablenkt“ sorgt dafür, dass die neu erweiterten Bereiche ruhig bleiben.
5. Interieur von 16:9 auf 9:16 erweitern
Originalbild, 16:9:
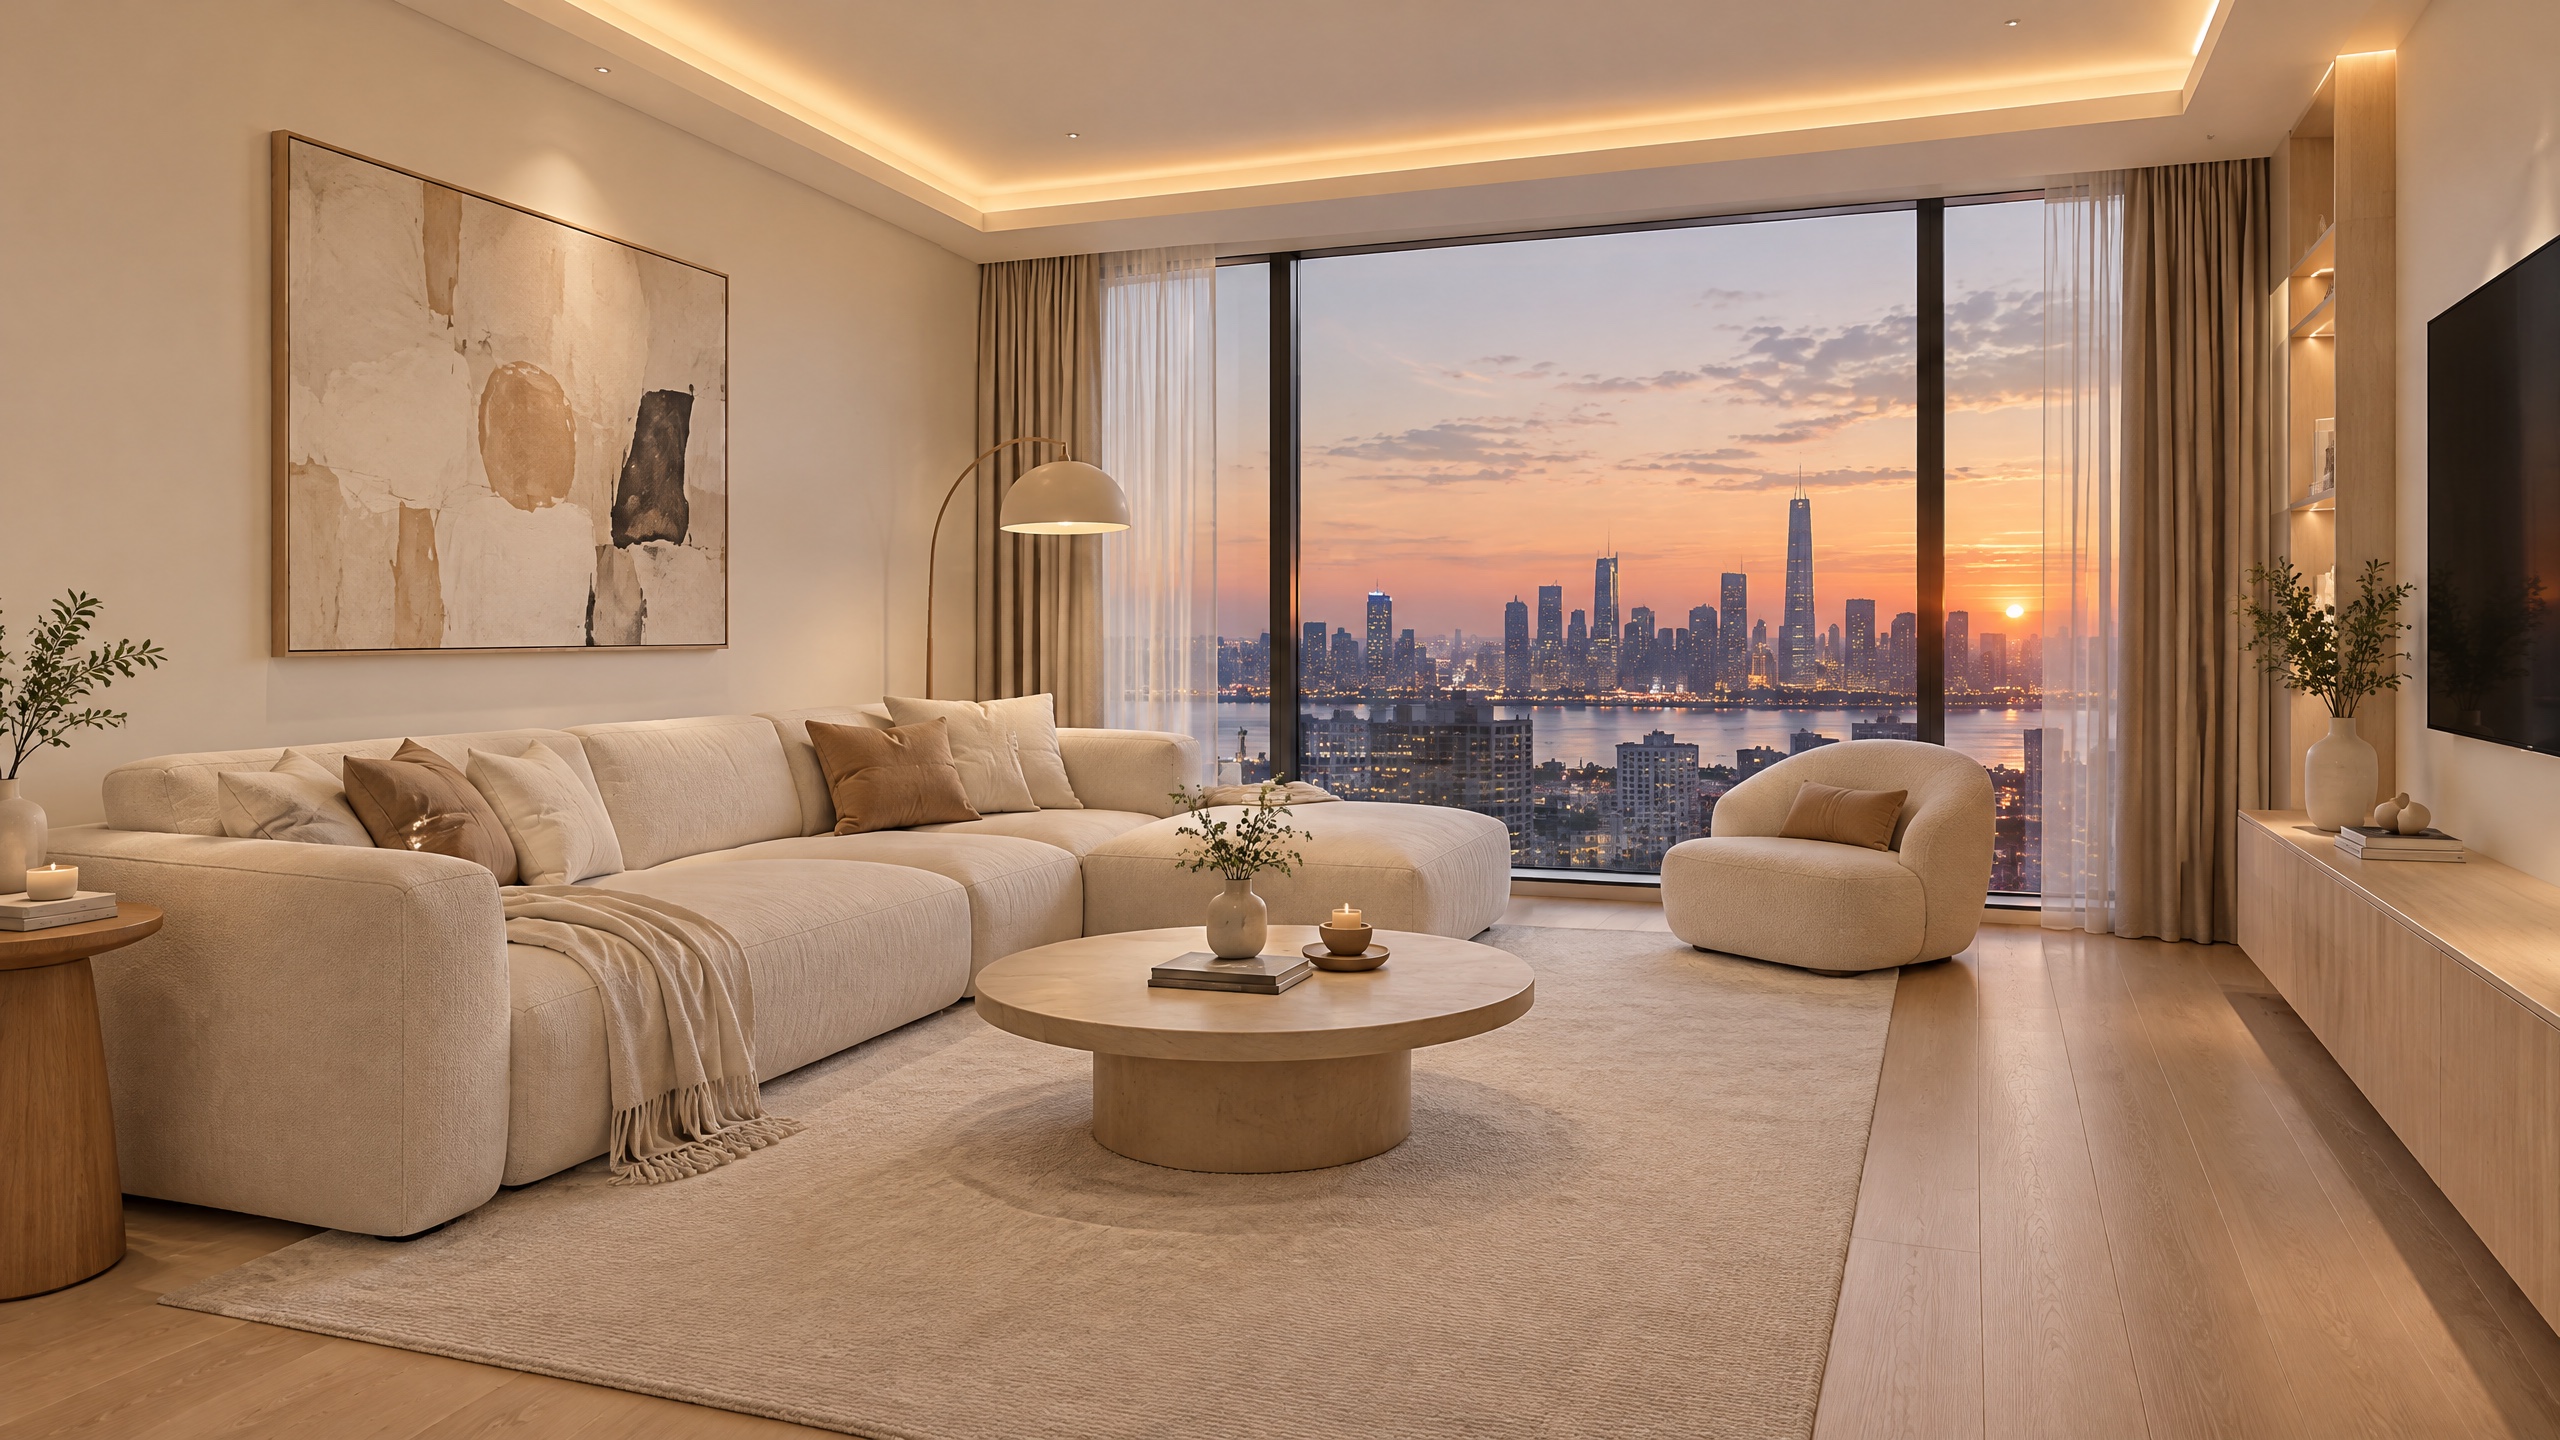
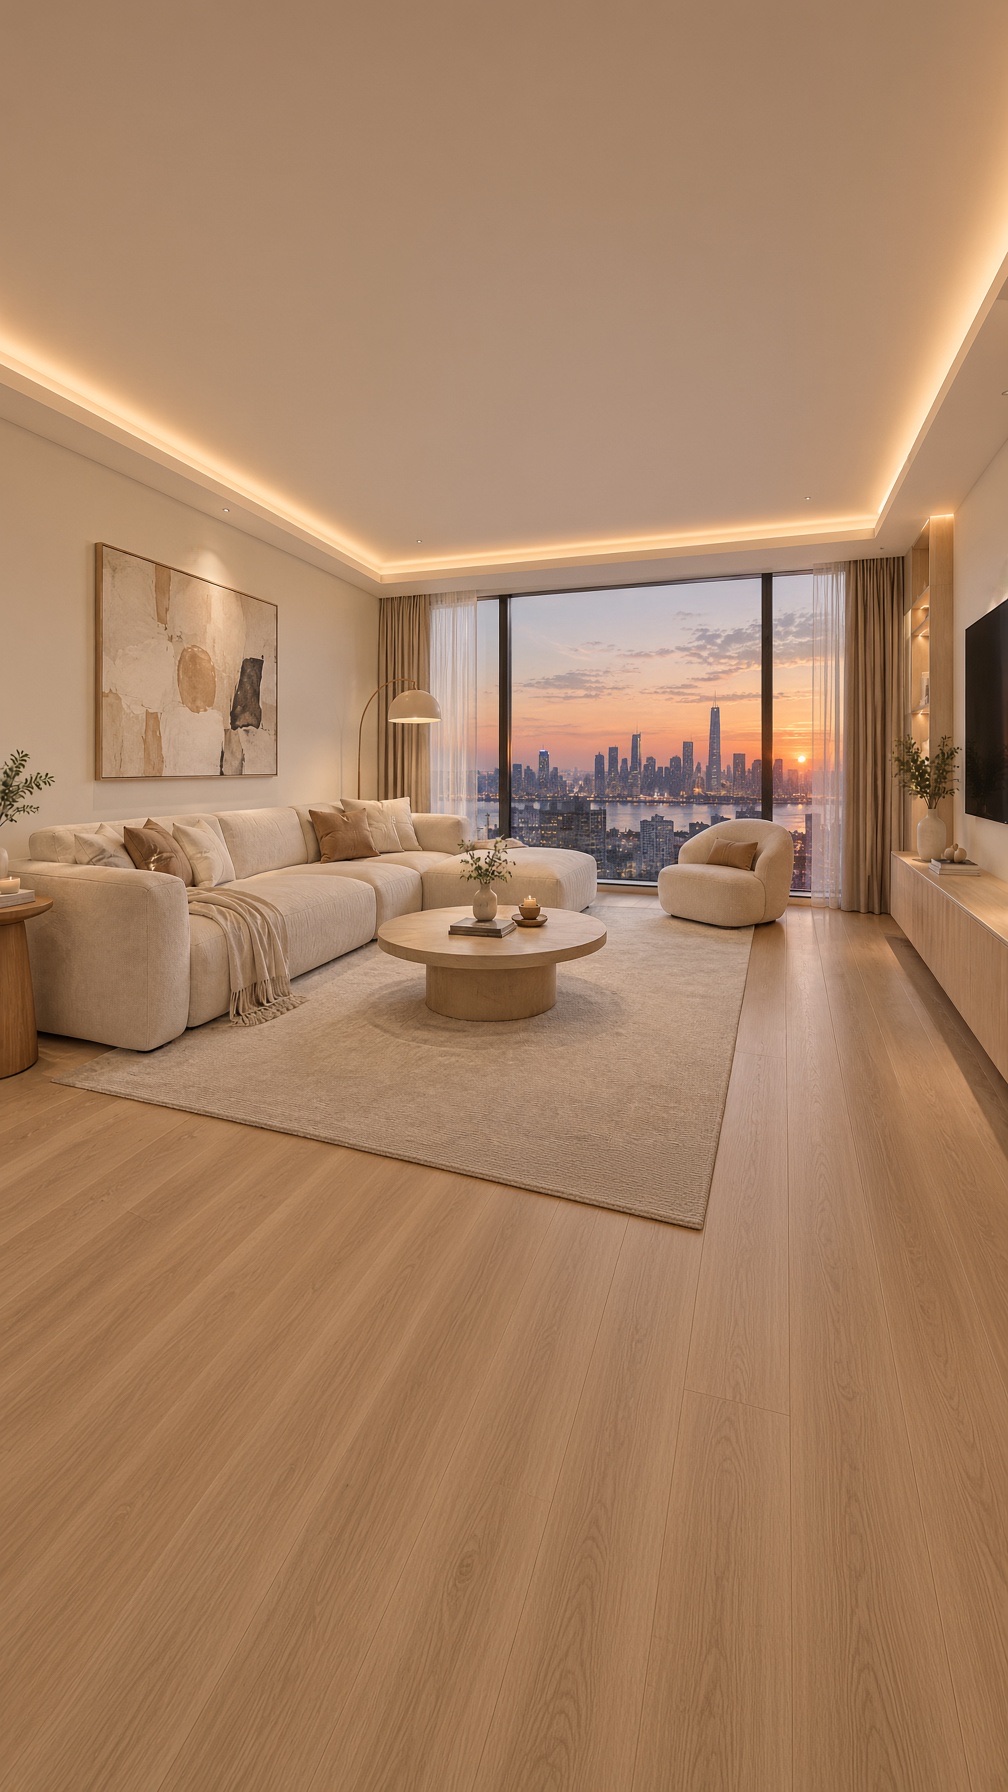
Extend this living room image vertically to a 9:16 frame. Keep the sofa, coffee table, window and skyline unchanged. Add more of the ceiling with the same hidden warm light strip above, and more of the light oak floor below. Same wide-angle eye-level perspective, same soft evening light.
Mit diesem Prompt generieren → (lade dein Bild hoch, Format 9:16, 1K)
grok-imagine/image-to-image, aspect_ratio: "9:16", 1K, Ausgabe 1008×1792, $0.033.
Ein Querformat-Interieur in ein Hochformat zu verwandeln gelingt, indem du oben die Decke und unten den Boden ergänzt – viel besser, als einfach die Seiten abzuschneiden. Schreibe auch die Perspektive erneut (Weitwinkel, Augenhöhe), damit die Raumstruktur nicht verzerrt wird.
Die Outpainting-Prompt-Formel
- Zielformat angeben: „Extend this photo to a 16:9 frame“ und gleichzeitig
aspect_ratioauf denselben Wert setzen. - Motiv fixieren: „Keep the [Motiv] exactly as it is, same size, shape, color“.
- Füllinhalt klar beschreiben: welcher Hintergrund, welche Oberfläche oder welches Licht sich in welche Richtung fortsetzt.
- Hinzufügen verbieten: „No new objects, no text“.
API-Aufruf
curl -X POST https://api.hiapi.ai/v1/tasks \
  -H "Authorization: Bearer $HIAPI_KEY" \
  -H "Content-Type: application/json" \
  -d '{
    "model": "grok-imagine/image-to-image",
    "input": {
      "prompt": "Extend this product photo to a wider 16:9 frame. Keep the bottle exactly as it is. Fill the new space with the same white background. No new objects, no text.",
      "image_urls": ["https://your-cdn.example.com/product.jpg"],
      "aspect_ratio": "16:9",
      "resolution": "1k"
    }
  }'
aspect_ratioOptionen:auto(behält das Originalverhältnis),2:1,20:9,19.5:9,16:9,4:3,3:2,1:1,2:3,3:4,9:16,9:19.5,9:20,1:2. Für Outpainting musst du ein vom Original abweichendes Verhältnis wählen.resolutionist klein geschrieben1koder2k;image_urlsübergibt 1–3 öffentlich zugängliche JPEG-, PNG- oder WebP-Bilder.- Preis: $0.03 pro Bild, plus $0.003 pro Referenzbild, mit einem Originalbild also $0.033.
- Mit
GET /v1/tasks/{taskId}das Ergebnis abfragen; wennstatussuccessist, ladeoutput[0].urlherunter – das ist ein temporärer Link.
Häufige Fragen
Behält Grok Imagine beim Outpainting die Originalpixel bei?
Nein. Es zeichnet das gesamte Bild im neuen Verhältnis neu, das Motiv kann sich verschieben oder leicht verändern. Für pixelgenaues Outpainting kannst du das Originalbild in einem Bildbearbeitungsprogramm über das Ergebnis legen.
Warum wurde das Motiv breiter gezogen?
Der Prompt ließ das „Bild“ breiter werden statt das „Format“. Schreibe „extend the frame/background“ und gib „keep the subject's size and shape“ an.
Kann man nur in eine Richtung erweitern?
Du kannst es im Prompt verlangen (z. B. „extend only the top“), aber die endgültige Komposition bestimmt das Modell – prüfe bei jedem Ergebnis die Position.
Welches andere Modell kann das auch?
Für höhere Referenztreue kannst du grok-imagine-quality/image-to-image verwenden, gleiche Parameter, 1K kostet $0.08 pro Bild, plus $0.015 pro Referenzbild. Weitere Prompt-Beispiele findest du unter Grok Imagine Image-to-Image-Prompt-Beispiele (auf Englisch).
Lade ein Bild hoch und probiere den ersten Prompt auf der Modellseite aus.
Ähnliche Artikel
Alle Artikel ansehen →-
Benutzerhandbuch
seedream-5.0-pro/image-to-image Erste-Schritte-Leitfaden: Fähigkeiten, Preise und Integrationspunkte
Fähigkeitsgrenzen, Abrechnungsmodell und Engineering-Integration des Bildbearbeitungsmodells von ByteDance
-
Benutzerhandbuch
seedream-5.0-pro Text-zu-Bild Einstiegsleitfaden: Fähigkeitsgrenzen, API-Integration und Kostenkontrolle
Praxisorientierte Perspektive für Entwickler: von den wichtigsten Parametern bis zur Kostenschätzung von $0,05 pro Bild
-
Benutzerhandbuch
Hailuo 2.3 Fast Bild-zu-Video-Anleitung: Grenzen der Leistungsfähigkeit, Preisgestaltung und Integration in die Praxis
MiniMax Bild-zu-Video-Modell für Entwickler: Auswahlkriterien und Integrationspunkte