
Guide
Imagen 4.0 Ultra Prompt Recipes: Copy-Paste Prompts for Realistic Detail and Lighting
A developer's guide to structuring prompts, controlling light, and using negative prompts on the top quality tier

On this page
Why prompt structure matters on the Ultra tier
The top quality tier of an image model is not a magic button. It is more faithful to your prompt, which cuts both ways: a vague prompt returns a polished but generic image, and a contradictory prompt returns something that looks confident and wrong. On the Ultra tier you are paying for fidelity, so the prompt itself becomes the main variable you control.
Keyword stuffing is the usual failure mode. Lists like 4k, ultra detailed, masterpiece, hyperrealistic, sharp focus, trending do not tell the model what to render or how to light it. They mostly add noise, and noise is expensive when every generation is a full-quality call.
A structured prompt does three things at once:
- It makes output repeatable. If your prompt has fixed slots, you can change one slot and know what caused the difference.
- It makes debugging possible. When an image is wrong, you can point at the block that failed (usually light or camera) instead of rewriting everything.
- It makes your integration testable. Prompt text becomes a versioned asset you can log, diff, and A/B test rather than a string buried in a function call.
The rest of this guide gives you a skeleton, a lighting vocabulary, a short rule for negative prompts, and a set of recipes you can paste into your own calls through the HiAPI.ai unified interface and adapt from there.

The five-block prompt skeleton
Use the same five blocks in the same order every time. The order matters less than the consistency, but subject-first reads best because later blocks act as modifiers on an already-established scene.
[subject] + [detail] + [light] + [camera] + [style]
Block 1: Subject
One sentence naming the main thing and its action or state. Concrete nouns beat adjectives.
A ceramic coffee cup on a wooden desk, steam rising
Block 2: Detail
What makes the subject specific — material, wear, texture, small imperfections. This is where realism is earned.
...glazed stoneware with a chipped rim, fine condensation on the outside, wood grain with visible scratches
Block 3: Light
The highest-leverage block. Name source, direction, and quality. Covered in the next section.
...lit by window light from the left, soft, overcast afternoon
Block 4: Camera
Framing, distance, and lens character. Keep it short: close-up, 50mm, shallow depth of field is usually enough.
...close-up, 50mm, shallow depth of field
Block 5: Style
Only now add rendering intent: editorial product photo, documentary, film still. Skip it entirely if you want neutral output.
...editorial product photography
Assembled, the full prompt is one line:
A ceramic coffee cup on a wooden desk, steam rising, glazed stoneware with a chipped rim, fine condensation on the outside, wood grain with visible scratches, lit by window light from the left, soft, overcast afternoon, close-up, 50mm, shallow depth of field, editorial product photography
Two rules of thumb. First, if a block has nothing useful to say, omit it rather than padding it. Second, keep the total under control — a tight prompt of five specific clauses generally outperforms a paragraph of qualifiers.

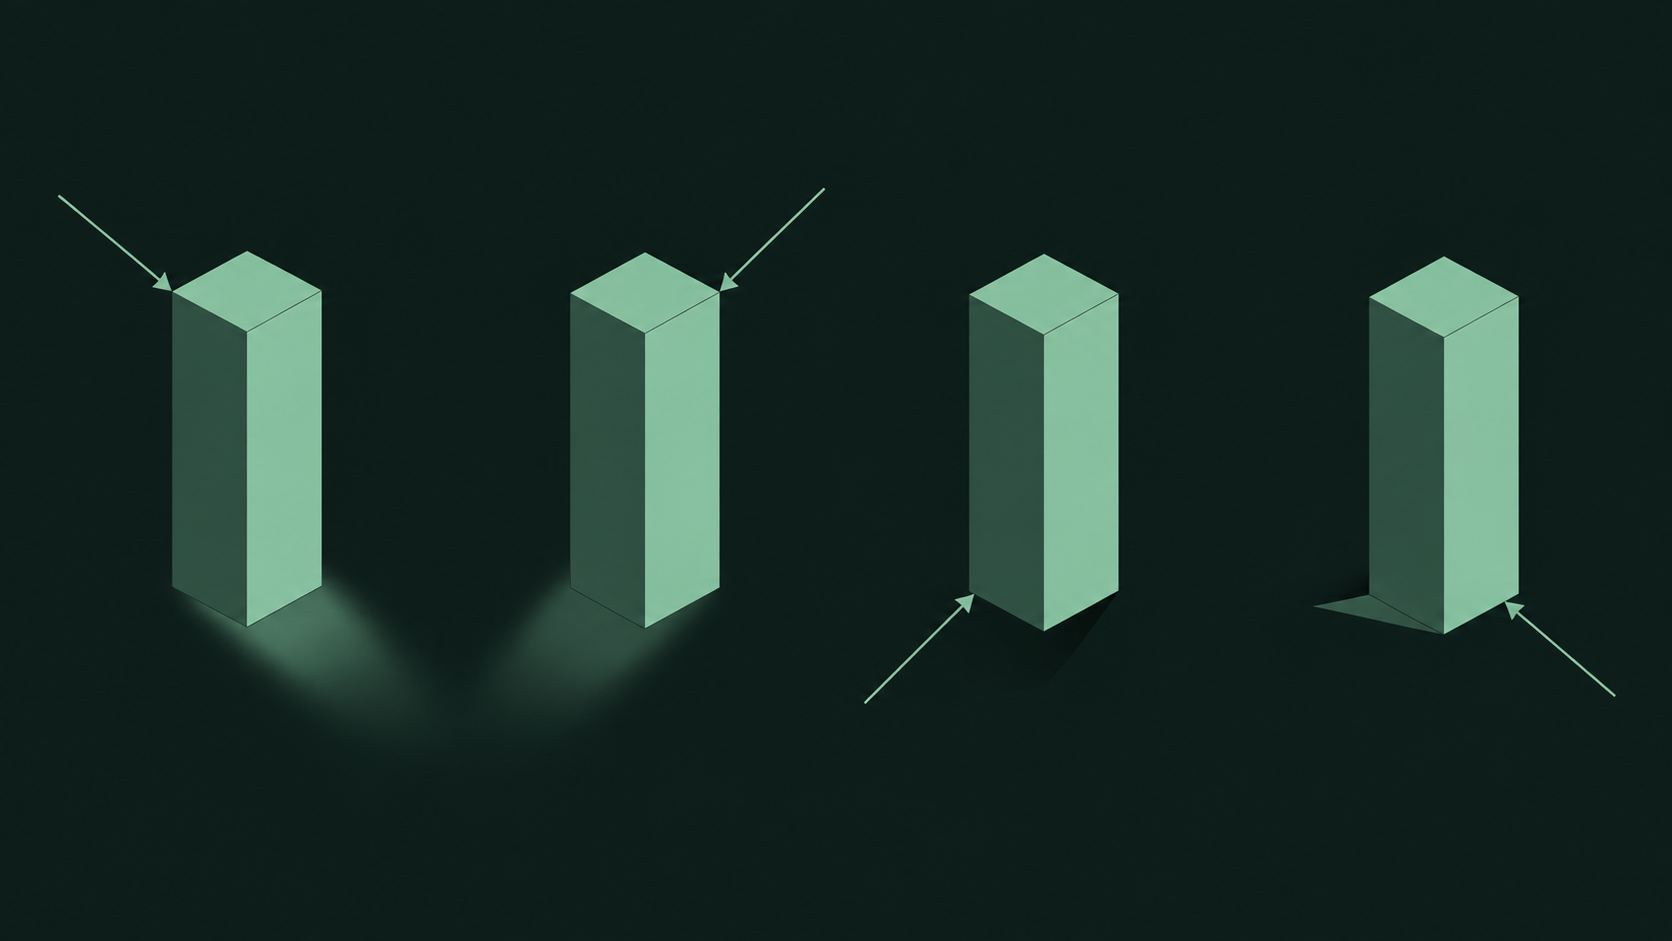
Controlling light and shadow in prompts
If you change one thing in your recipes, change the lighting block. Light determines mood, reveals texture, and is the fastest way to move an image from "rendered" to "photographed."
Name four properties explicitly:
- Source: window, overcast sky, bare bulb, candle, softbox, screen glow, streetlight.
- Direction: from the left, backlit, overhead, low side light, three-quarter front.
- Hardness: soft and diffused versus hard and directional. This controls shadow edges more than anything else.
- Time of day: overcast afternoon, golden hour, blue hour, midday sun, night.
Vocabulary that travels well
soft window light from the left, gentle falloff
hard midday sun, crisp shadows, high contrast
backlit with rim light, subject in shadow
overcast daylight, flat and even, minimal shadow
single warm lamp, dark surroundings, pool of light
Common lighting mistakes
Contradictions. soft light, harsh shadows gives the model two incompatible instructions. Pick one.
Unnamed direction. good lighting is not a control; it is a wish. Always state where the light comes from.
Lighting and camera fighting. backlit plus evenly lit close-up pulls in opposite directions. Let the lighting block decide, and let the camera block describe framing only.
Time of day as flavor. golden hour is a real, useful constraint. beautiful light is not.
A useful habit: write the lighting block first, before the detail block. If you know you want hard side light, you already know the texture needs to survive strong contrast, which tells you what to emphasize in the detail block.
When and how to use negative prompts
Negative prompts are a short list of what to avoid, not a second prompt. The moment they grow into a full description of a different image, they start competing with your positive prompt and produce muddled results.
What negatives are good at
- Removing recurring artifacts:
text, watermark, logowhen your subject keeps sprouting signage. - Steering composition away from defaults:
centered composition, symmetricalwhen the model keeps defaulting to a flat, centered layout. - Killing a specific unwanted style:
cartoon, 3d render, illustrationwhen you want photographic output. - Suppressing unwanted elements:
crowd, background peoplefor a clean product shot.
What negatives cannot do
They cannot reliably fix anatomy, hands, or text rendering — those are model-level limits, not prompt-level ones. They also cannot add detail your positive prompt never asked for. If you want fine texture, describe fine texture; do not list blurry and hope.
Keep it to three to six items
text, watermark, extra fingers, oversaturated, cartoon
That is a healthy list. A list of twenty terms is usually a sign that the positive prompt is underspecified — fix that first, then re-test with a shorter negative list. Rebuild negatives per recipe rather than reusing one global list across every scene; a negative that helps a portrait often hurts a landscape.
Copy-paste recipes to start from
Each recipe below follows the five-block skeleton. Paste it, then change exactly one variable — the one named in bold — and compare against your baseline. Treat these as starting points, not final answers.
Recipe 1: Product close-up with real texture
A matte black mechanical keyboard on a concrete desk, visible keycap wear and dust in the seams, hard side light from the right, crisp shadows, 85mm, shallow depth of field, editorial product photography
Variable to tweak: swap hard side light for soft window light and watch how much surface texture survives. This single change teaches you the most about the model's lighting response.
Recipe 2: Portrait with environmental context
A woman in her forties standing in a workshop, sawdust on her sleeves, faint smile, overcast daylight from a large window behind camera-left, soft even light, 50mm, medium shot, documentary photography
Variable to tweak: the time of day. Try late afternoon sun, warm rim light and compare skin tones and shadow behavior.
Recipe 3: Interior scene with motivated light
A small apartment kitchen at night, dishes drying on the rack, one warm pendant lamp above the table, dark surroundings with a pool of light, 35mm, wide shot, natural film still
Variable to tweak: the light source count. Add plus cool light from a hallway to create a two-source mix, which is where interiors start to feel real.
Recipe 4: Landscape with weather, not decoration
A rocky coastline at low tide, wet stones and seaweed, distant fog bank, soft directional light breaking through cloud from the upper left, 24mm, wide shot, landscape photography
Variable to tweak: hardness. Try hard sunlight, crisp shadows on the same scene and compare how the fog reads.
Recipe 5: Food with honest imperfections
A half-eaten slice of sourdough toast with butter, crumbs on a linen napkin, uneven toast edges, warm window light from the left, soft falloff, 100mm macro, shallow depth of field, food photography
Variable to tweak: the detail block. Remove the imperfection clauses entirely and see how much realism you lose — this makes the value of the detail block concrete.
Keep a note of which recipe you adapted and which variable you changed. That note is the beginning of your own prompt library.
Testing recipes in your own pipeline
A recipe is only useful if you can tell whether it got better. That requires a minimal amount of process — not a framework, just discipline.
Log every generation
For each call, store: the prompt text, the recipe ID, the single variable changed (if any), and the output. A flat JSON log or a single file per run is enough. Without the log, you will be comparing from memory, and memory is unreliable across dozens of variants.
Change one variable at a time
Pick a baseline recipe, run it, then produce variants that differ in exactly one clause. If you change lighting and detail in the same call, you cannot attribute the result. Yes, this is slower. It is also the only way to build intuition that transfers between scenes.
Score, don't just eyeball
Keep a short rubric you apply consistently: subject accuracy, texture realism, lighting correctness, artifacts. Even a quick three-point rating per dimension turns a pile of images into a comparable set.
Know when to ship
A recipe is ready when it produces acceptable output across a small set of reruns of the same prompt, and when the one variable you care about behaves predictably when you change it. If a recipe only works once, it is not a recipe.
Re-test as things change
Wording that works today may not behave identically later, since model versions and platform behavior change over time. When you notice drift, rerun your baseline set and update the affected recipes rather than rewriting everything.
Run your variants through the HiAPI.ai unified interface and keep the log alongside your code, so a recipe change is a reviewable diff like any other asset.
Related articles
View all articles →-

Guide
seedream-5.0-flash Getting Started: Capabilities, Pricing, and Integration Essentials
Text-to-image and image-to-image integration guide with per-image pricing for developers
8 min read -

Guide
Using wan2.7-video/text-to-video via the HiAPI API: A Practical Short-Form Video Workflow
Prompt-to-clip patterns, camera phrasing, and a working API request for short-form video
13 min read -

Guide
MiniMax H3 Max Turbo Guide: Text-to-Video, First/Last-Frame Image-to-Video, Parameters and Pricing
Which ID to use, how to set parameters, and what it costs
4 min read