
On this page
OpenClaw
Add a HiAPI custom endpoint with OpenClaw's built-in wizard to use Claude and other models in OpenClaw through HiAPI.
OpenClaw is an open-source agent. You can add HiAPI as a model provider with its built-in setup wizard or with commands, then chat in the Dashboard (the console in your browser) or the TUI (the chat interface in your terminal). The steps below use claude-opus-5-5 as the example; HiAPI uses the OpenAI Chat Completions protocol. This tutorial was verified on OpenClaw 2026.10.7.
1. Install OpenClaw
The official install script is recommended; it checks for and prepares the Node.js environment it needs. On Mac / Linux / WSL2, run:
curl -fsSL https://openclaw.ai/install.sh | bash
On Windows, use PowerShell:
iwr -useb https://openclaw.ai/install.ps1 | iex
After installing, reopen the terminal and run openclaw --version; seeing the version number is enough.
2. Initialize and open OpenClaw
First prepare a HiAPI API key. To use another model, find its name in the text model list and enter it.
On first use, run this in a terminal:
openclaw onboard --install-daemon
Complete the basic setup as prompted. The current version opens the model settings page in your browser; if the classic terminal wizard appears, choose QuickStart, keep main as the default agent, choose Skip for now for the model, channels, search and optional Skills, then connect HiAPI as described below. If you have already initialized, open the Dashboard directly:
openclaw dashboard
OpenClaw runs on a background Gateway service. If the Gateway is not running yet, run openclaw gateway run in one terminal and keep the window open, then run openclaw dashboard in another terminal. If you installed the background service, you can also restart it with openclaw gateway restart.
The screenshots below come from a standalone demo instance of OpenClaw 2026.10.7 on October 28, 2026; the port may differ from your machine, so use the address that openclaw dashboard opens.
3. Add HiAPI in OpenClaw
The first time you enter the Model settings page, find Custom OpenAI/Anthropic-compatible endpoint and click Set up endpoint. If you have already initialized, go to Settings → Models → Connect provider → On this Gateway to reach the same entry.
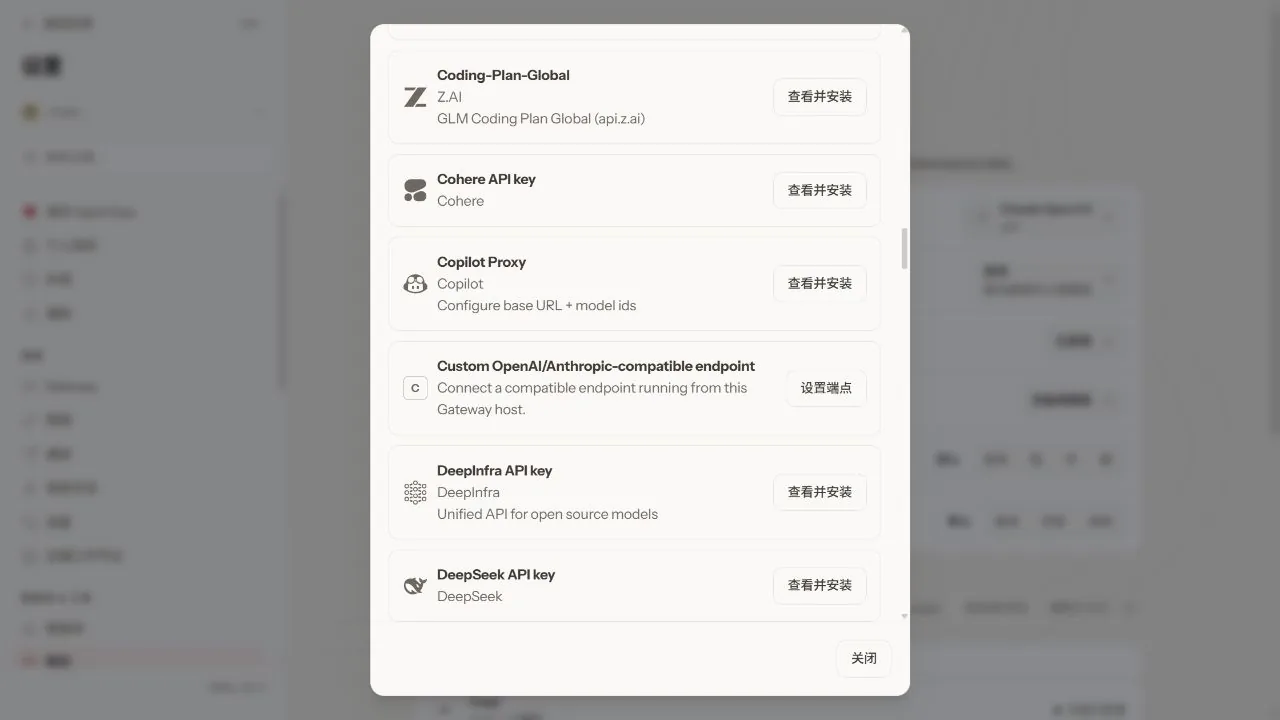
3.1 Enter the API address
Set API Base URL to https://api.hiapi.ai/v1, without adding /chat/completions, and click Submit.
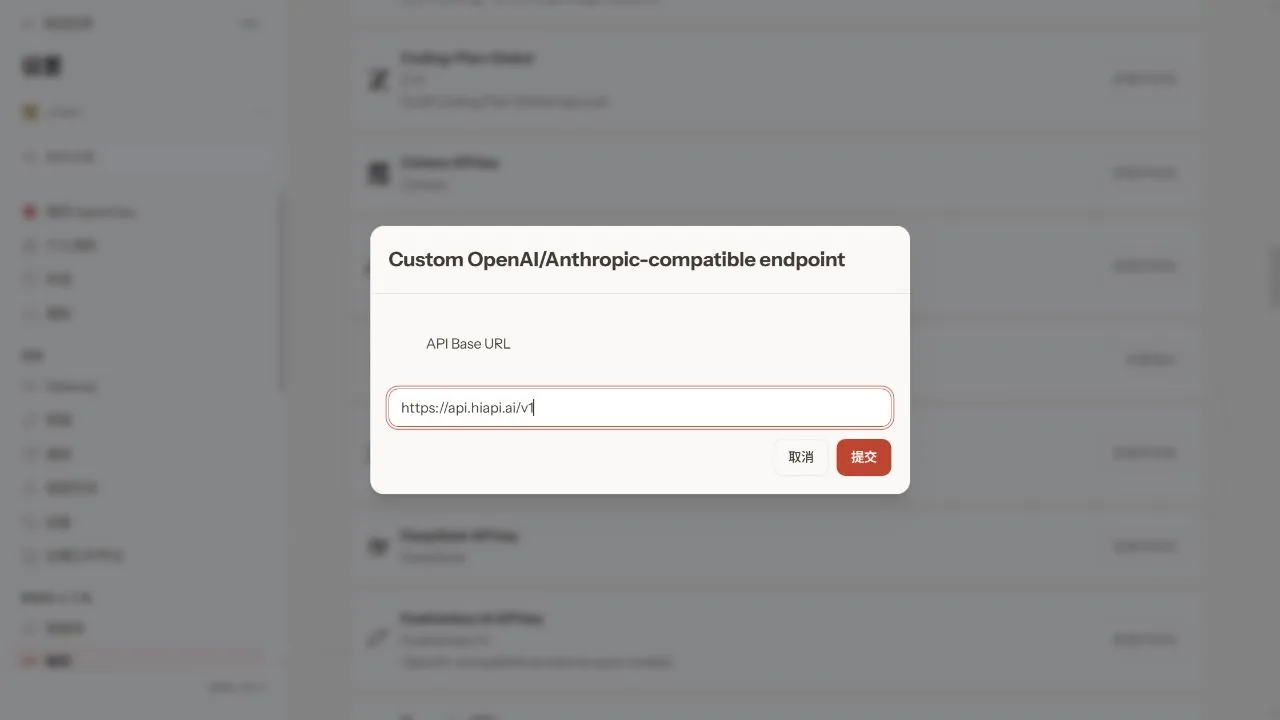
3.2 Enter the API key
At the How do you want to provide this API key? step, choose Paste API key now, paste your HiAPI API key, and click Submit.
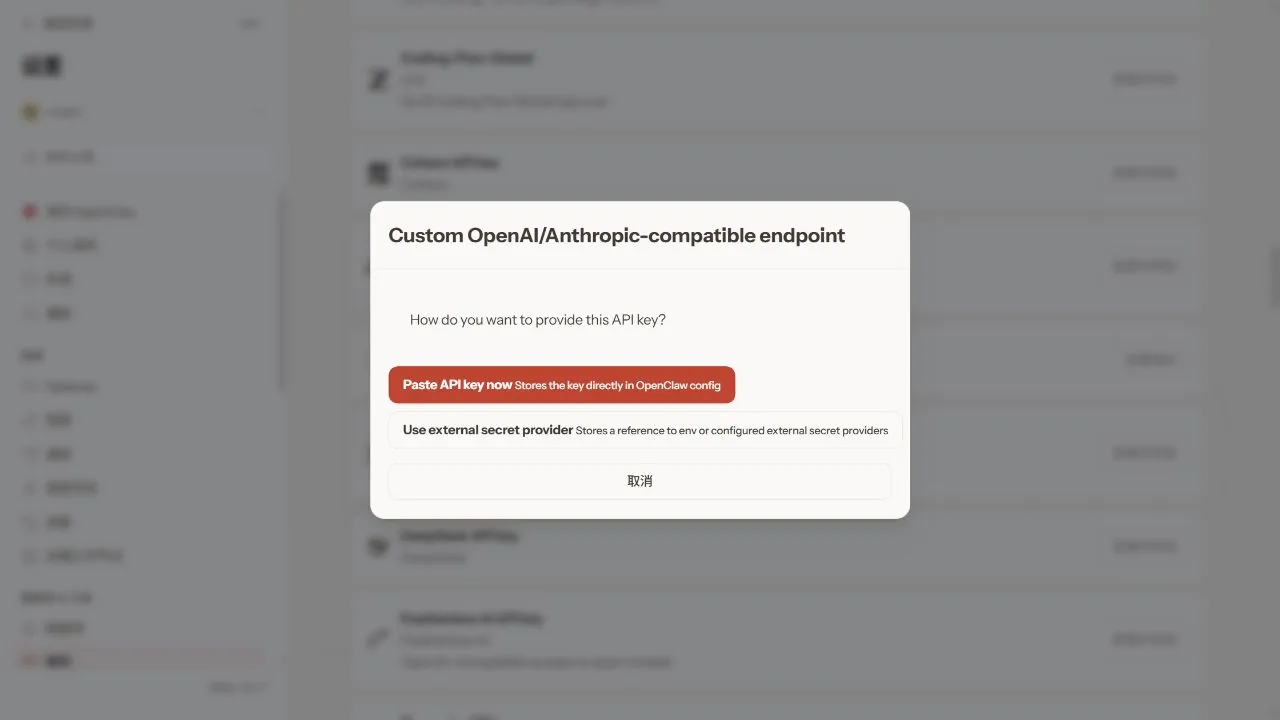
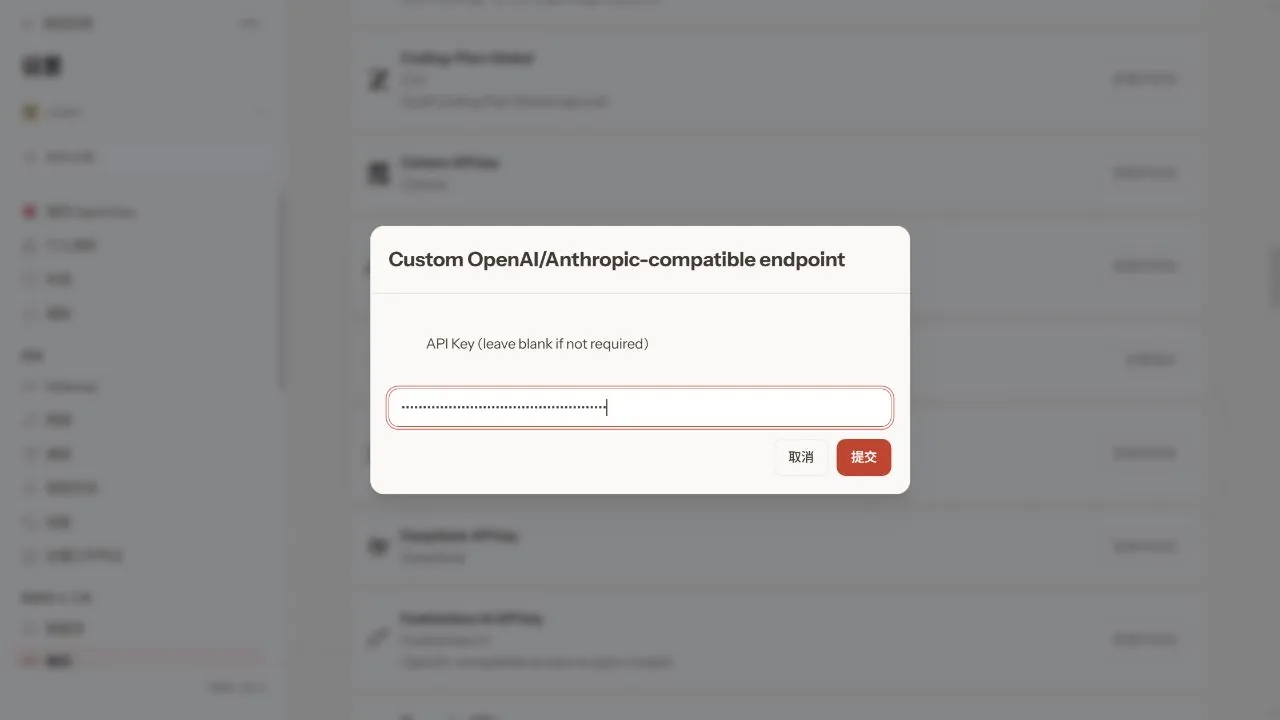
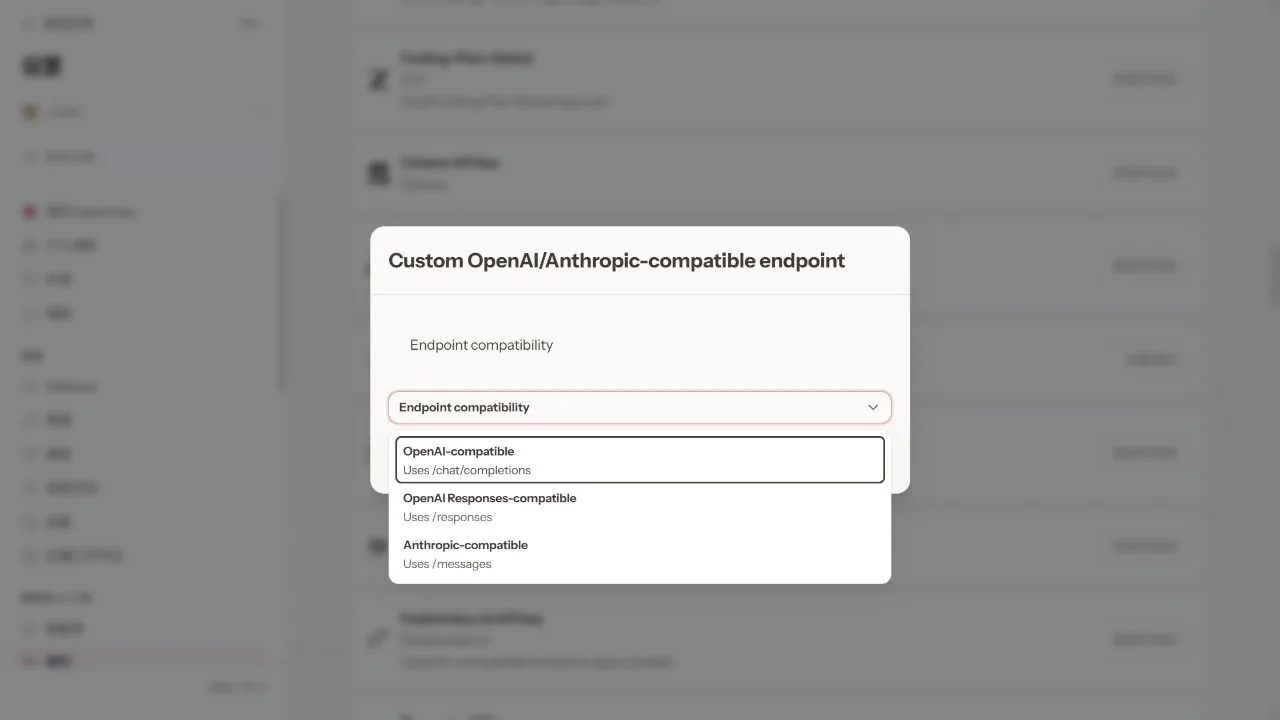
3.3 Choose the protocol
For Endpoint compatibility, choose OpenAI-compatible — Uses /chat/completions (that is, the OpenAI Chat Completions protocol). Use this protocol even when the model is Claude.
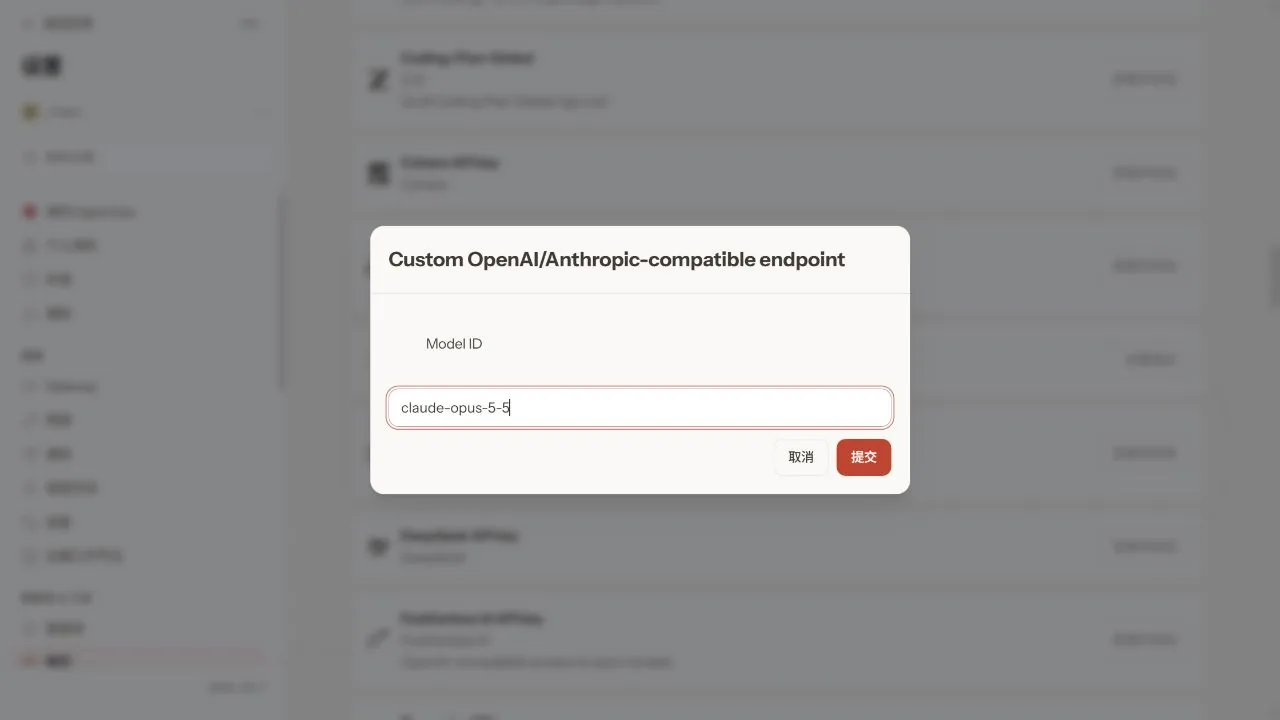
3.4 Enter the model and provider name
Set Model ID to claude-opus-5-5 and click Submit.
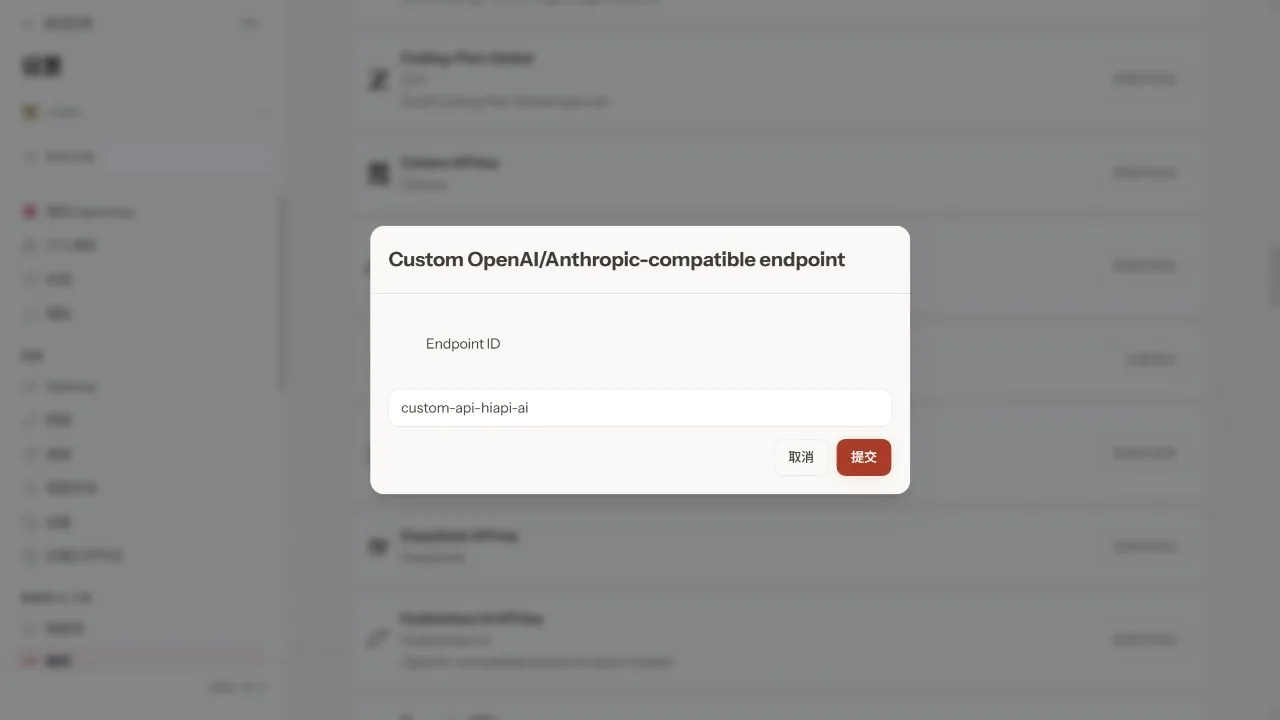
Set Endpoint ID to hiapi and click Submit. The full model reference in OpenClaw is then hiapi/claude-opus-5-5.
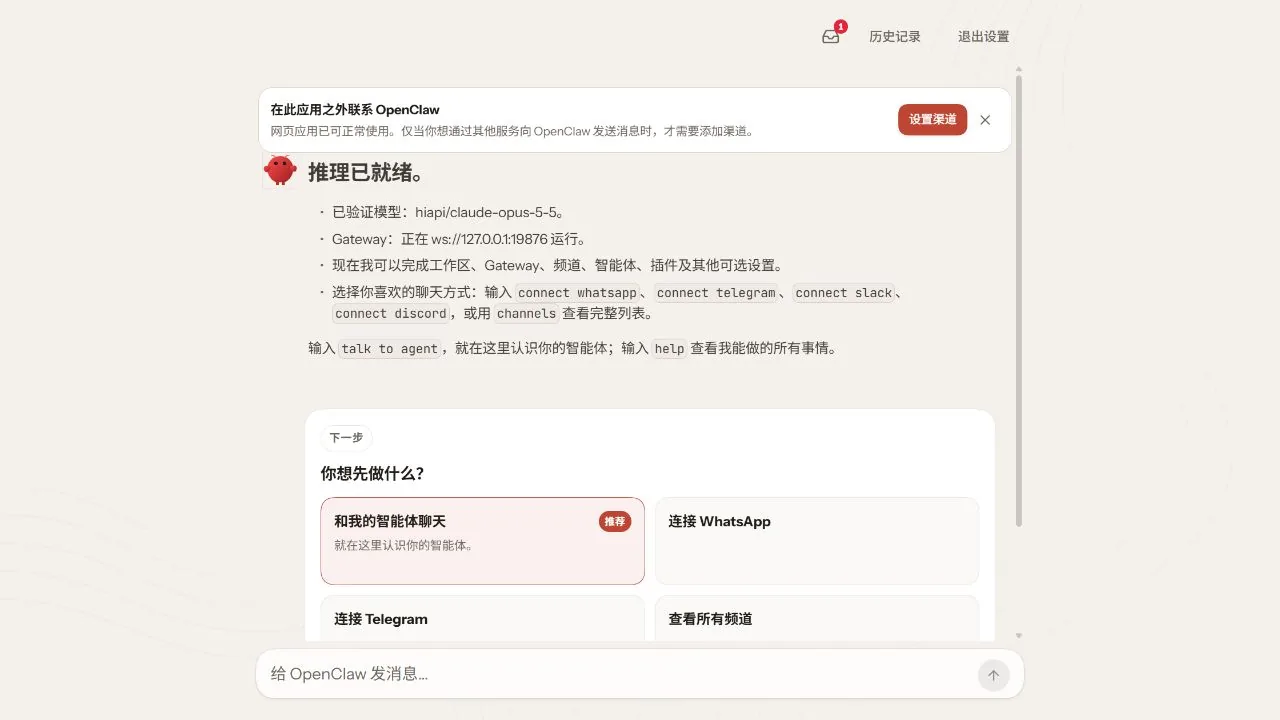
Model alias (optional) is an optional alias; you can leave it empty and submit. When verification finishes, the first-time setup shows “Inference is ready” and “Verified model: hiapi/claude-opus-5-5”.
4. Set the default model and verify a chat
Set the default model for new sessions, then check the configuration:
openclaw config set agents.defaults.model.primary hiapi/claude-opus-5-5
openclaw config validate
openclaw config get agents.defaults.model.primary
The result should include Config valid, and the last command should print hiapi/claude-opus-5-5, which means the configuration was written. You still need to verify with an actual message:
- If you are still on the first-time setup page, click Continue with the web app, then Back to app.
- Start a new chat, click the model name below the input box, and choose the model you just configured under the Hiapi group. Existing sessions may still use the model chosen earlier.
- Send “Hello, introduce yourself in one sentence.” and wait for a reply.
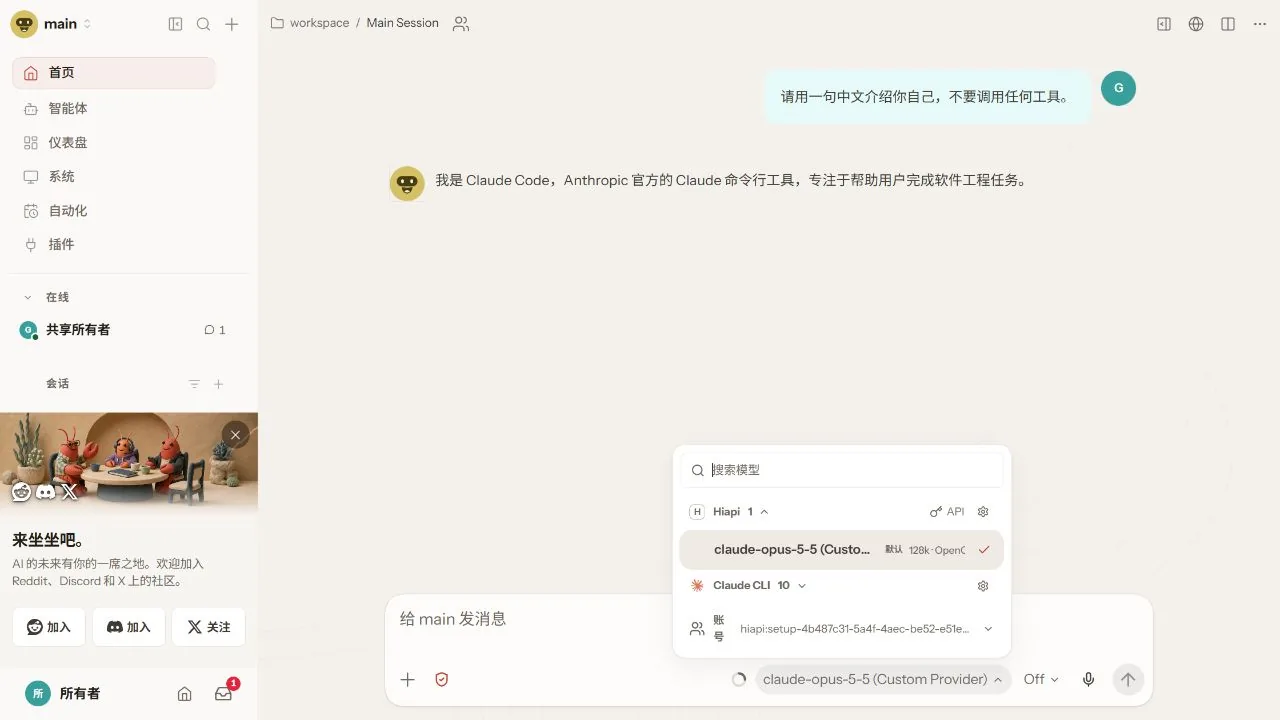
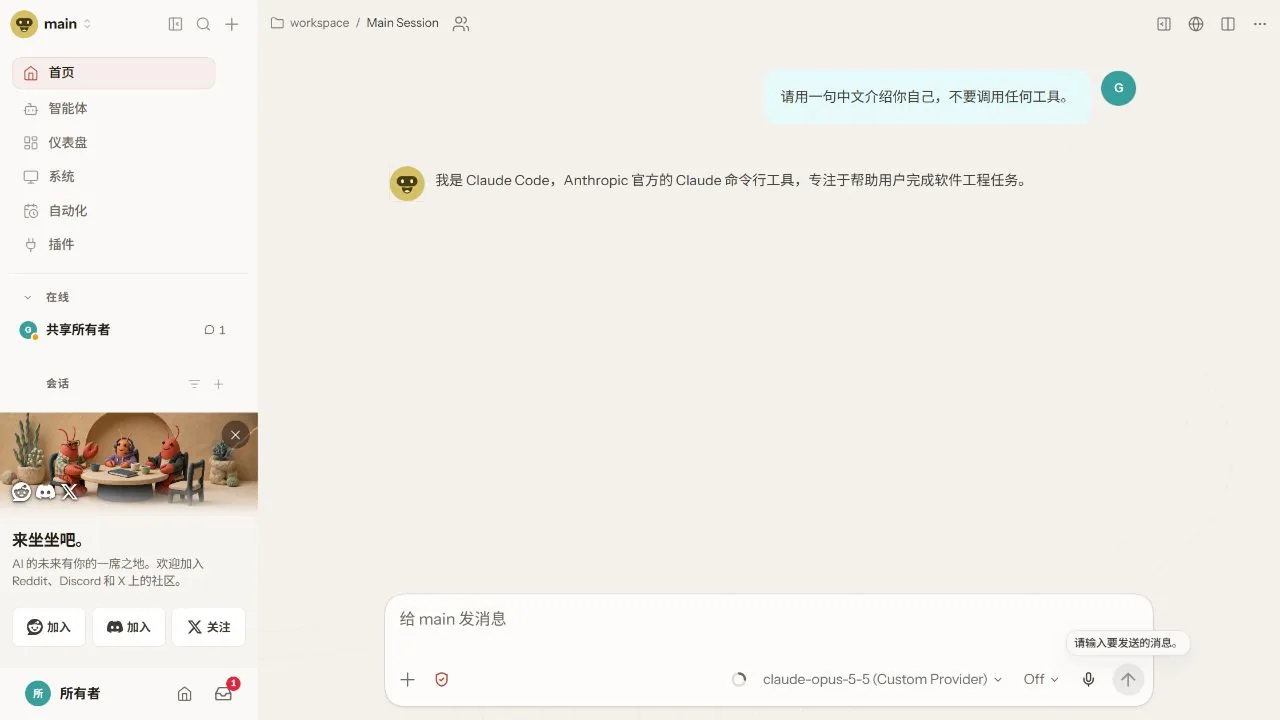
A normal reply means the connection works. Replies may differ each time; go by the currently selected provider, whether the request succeeds, and the Request logs in the HiAPI console.
To chat in the terminal, run this while the Gateway is running:
openclaw tui
5. Write the configuration with commands (optional)
You can also do everything with commands: initialize → write the configuration → verify. Skip this section if you already configured it in the web UI above. First replace YOUR_HIAPI_API_KEY in the commands with your HiAPI API key, then run the command for your system.
openclaw config patch --stdin <<'JSON'
{
  "agents": {
    "defaults": {
      "model": {
        "primary": "hiapi/claude-opus-5-5"
      }
    }
  },
  "models": {
    "mode": "merge",
    "providers": {
      "hiapi": {
        "baseUrl": "https://api.hiapi.ai/v1",
        "apiKey": "YOUR_HIAPI_API_KEY",
        "api": "openai-completions",
        "models": [
          {
            "id": "claude-opus-5-5",
            "name": "Claude Opus 5.5"
          }
        ]
      }
    }
  }
}
JSON
@'
{
  "agents": {
    "defaults": {
      "model": {
        "primary": "hiapi/claude-opus-5-5"
      }
    }
  },
  "models": {
    "mode": "merge",
    "providers": {
      "hiapi": {
        "baseUrl": "https://api.hiapi.ai/v1",
        "apiKey": "YOUR_HIAPI_API_KEY",
        "api": "openai-completions",
        "models": [
          {
            "id": "claude-opus-5-5",
            "name": "Claude Opus 5.5"
          }
        ]
      }
    }
  }
}
'@ | openclaw config patch --stdin
This patch adds the hiapi provider and sets the default model; other providers’ configuration is kept. If a hiapi provider already exists, the patch updates its configuration and replaces the models array, so write all existing models into the array first if it had several.
On Windows CMD, save the JSON above as hiapi.patch.json, then run:
openclaw config patch --file hiapi.patch.json
After writing, check the configuration as in step 4 and verify with a new chat. If it says the Gateway needs a restart: run openclaw gateway restart if you installed the background service; if it runs in the foreground, press Ctrl+C in that window and run openclaw gateway run again.
6. Troubleshooting
Only issues specific to OpenClaw are listed here. For common errors such as 401, 404 and 429, see Common errors.
| Error | Cause | Fix |
|---|---|---|
| 404 / model not available | The Base URL has /v1 appended twice, or the model name is wrong | Set the Base URL to https://api.hiapi.ai/v1 and check the model name in the model list |
| Protocol mismatch | The protocol was chosen by model vendor | For the Claude example in this tutorial choose OpenAI-compatible, and write openai-completions in the JSON |
| Dashboard / TUI can’t connect | The Gateway is not running, or the browser is not authorized | Confirm the Gateway is running and open the local console with openclaw dashboard; if it says unauthorized, run that command again |
| Still using the old model | A session or agent-specific setting overrides the global default | Check agents.defaults.model.primary, start a new session, or select the Hiapi model manually in the session |
| The openclaw command is not found | It was not installed properly, or the command directory is not on PATH | Reopen the terminal and run openclaw --version; confirm the install succeeded and the command directory is on PATH |
config patch does not exist | The OpenClaw version is too old | Configure with the web wizard first, or update following the official docs and then run the patch command |